One thing that used to always hold me back from drawing more often was that I didn’t have a designated space for my art. Or, once I did have a place and was growing my art business, there wasn’t enough storage and I was always moving piles of things out of the way in order to work…
It took me awhile, but I finally figured out what works best for my space. And the beautiful thing about making space for your art is that you don’t need a lot of it! A corner in a room or a small desk by a window is really all you need – and if I can make it work in a one-bedroom New York City apartment, I promise that you can too. =) It just takes a bit of creativity to make the most of the space you have. And that happens to be one of my favorite things to do!
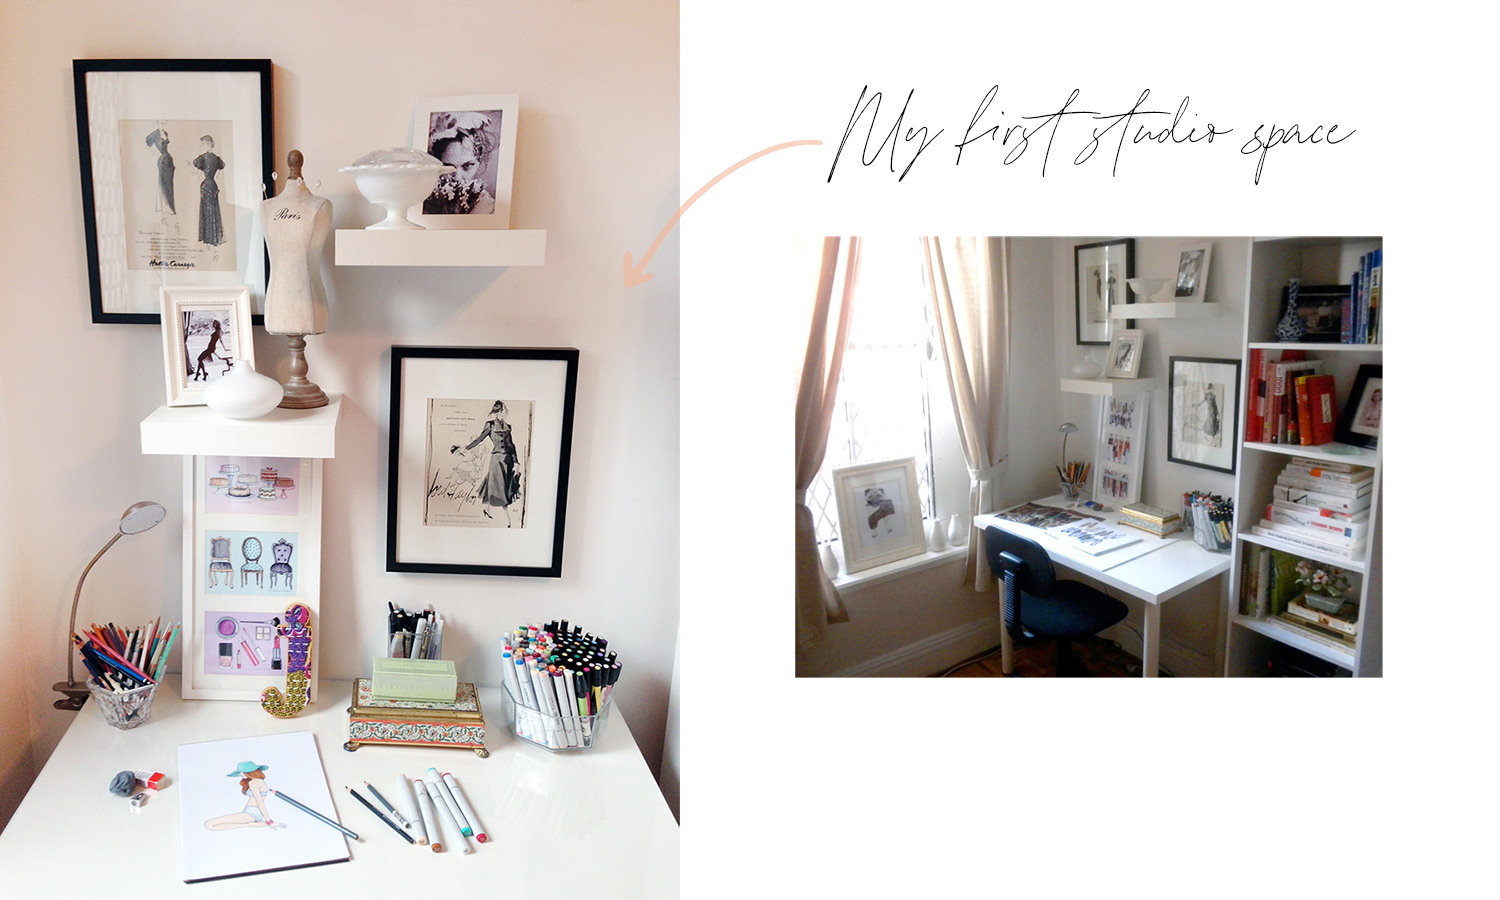
Here’s a look at my first little studio space in our old apartment. I kept it super simple and low maintenance when I was first starting out. This was while I still had a full-time job, before I made the leap and launched my illustration business.
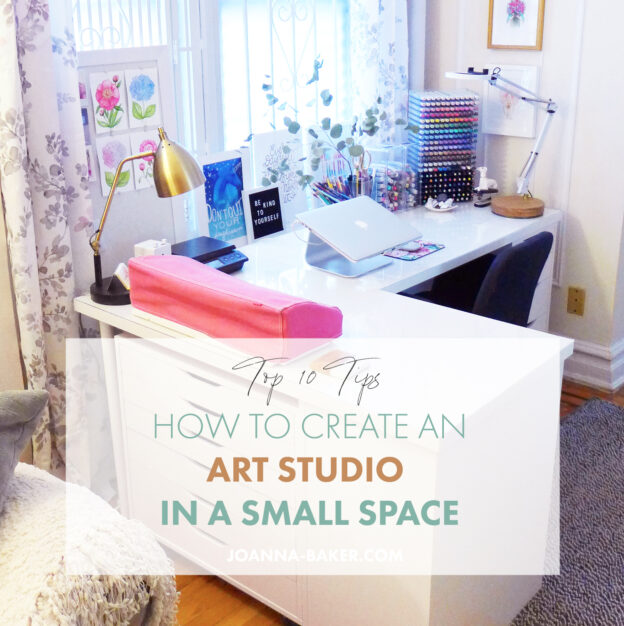
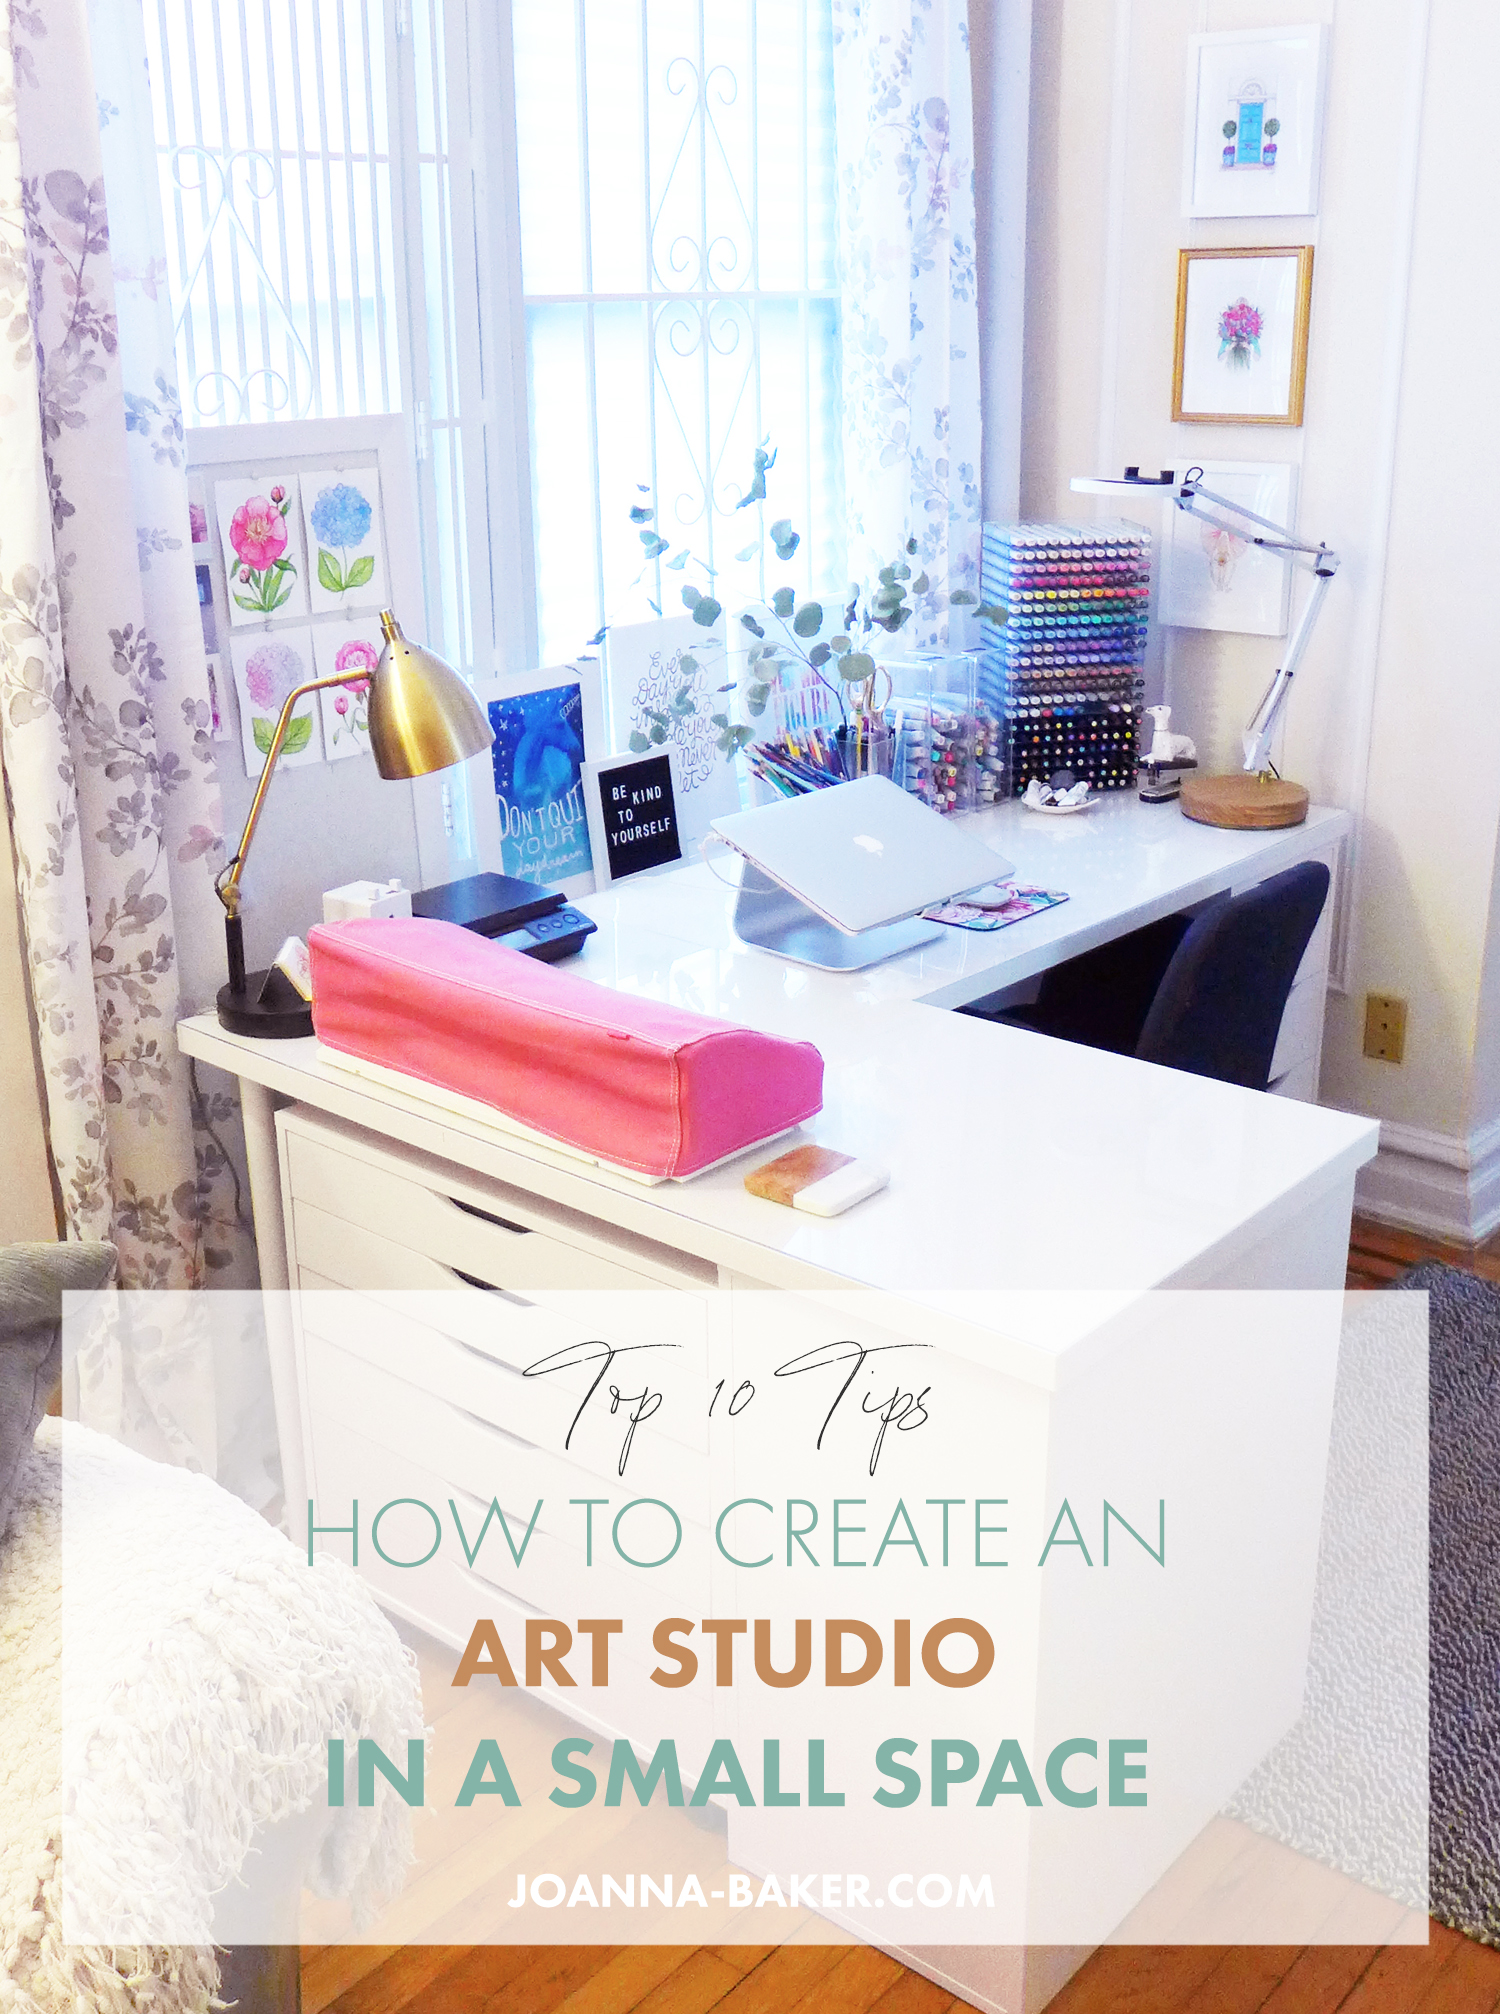
When we moved to our current apartment, I added some more storage. And then I expanded my desk space and kept adding storage…LOL! Seven years later, here’s my space now.
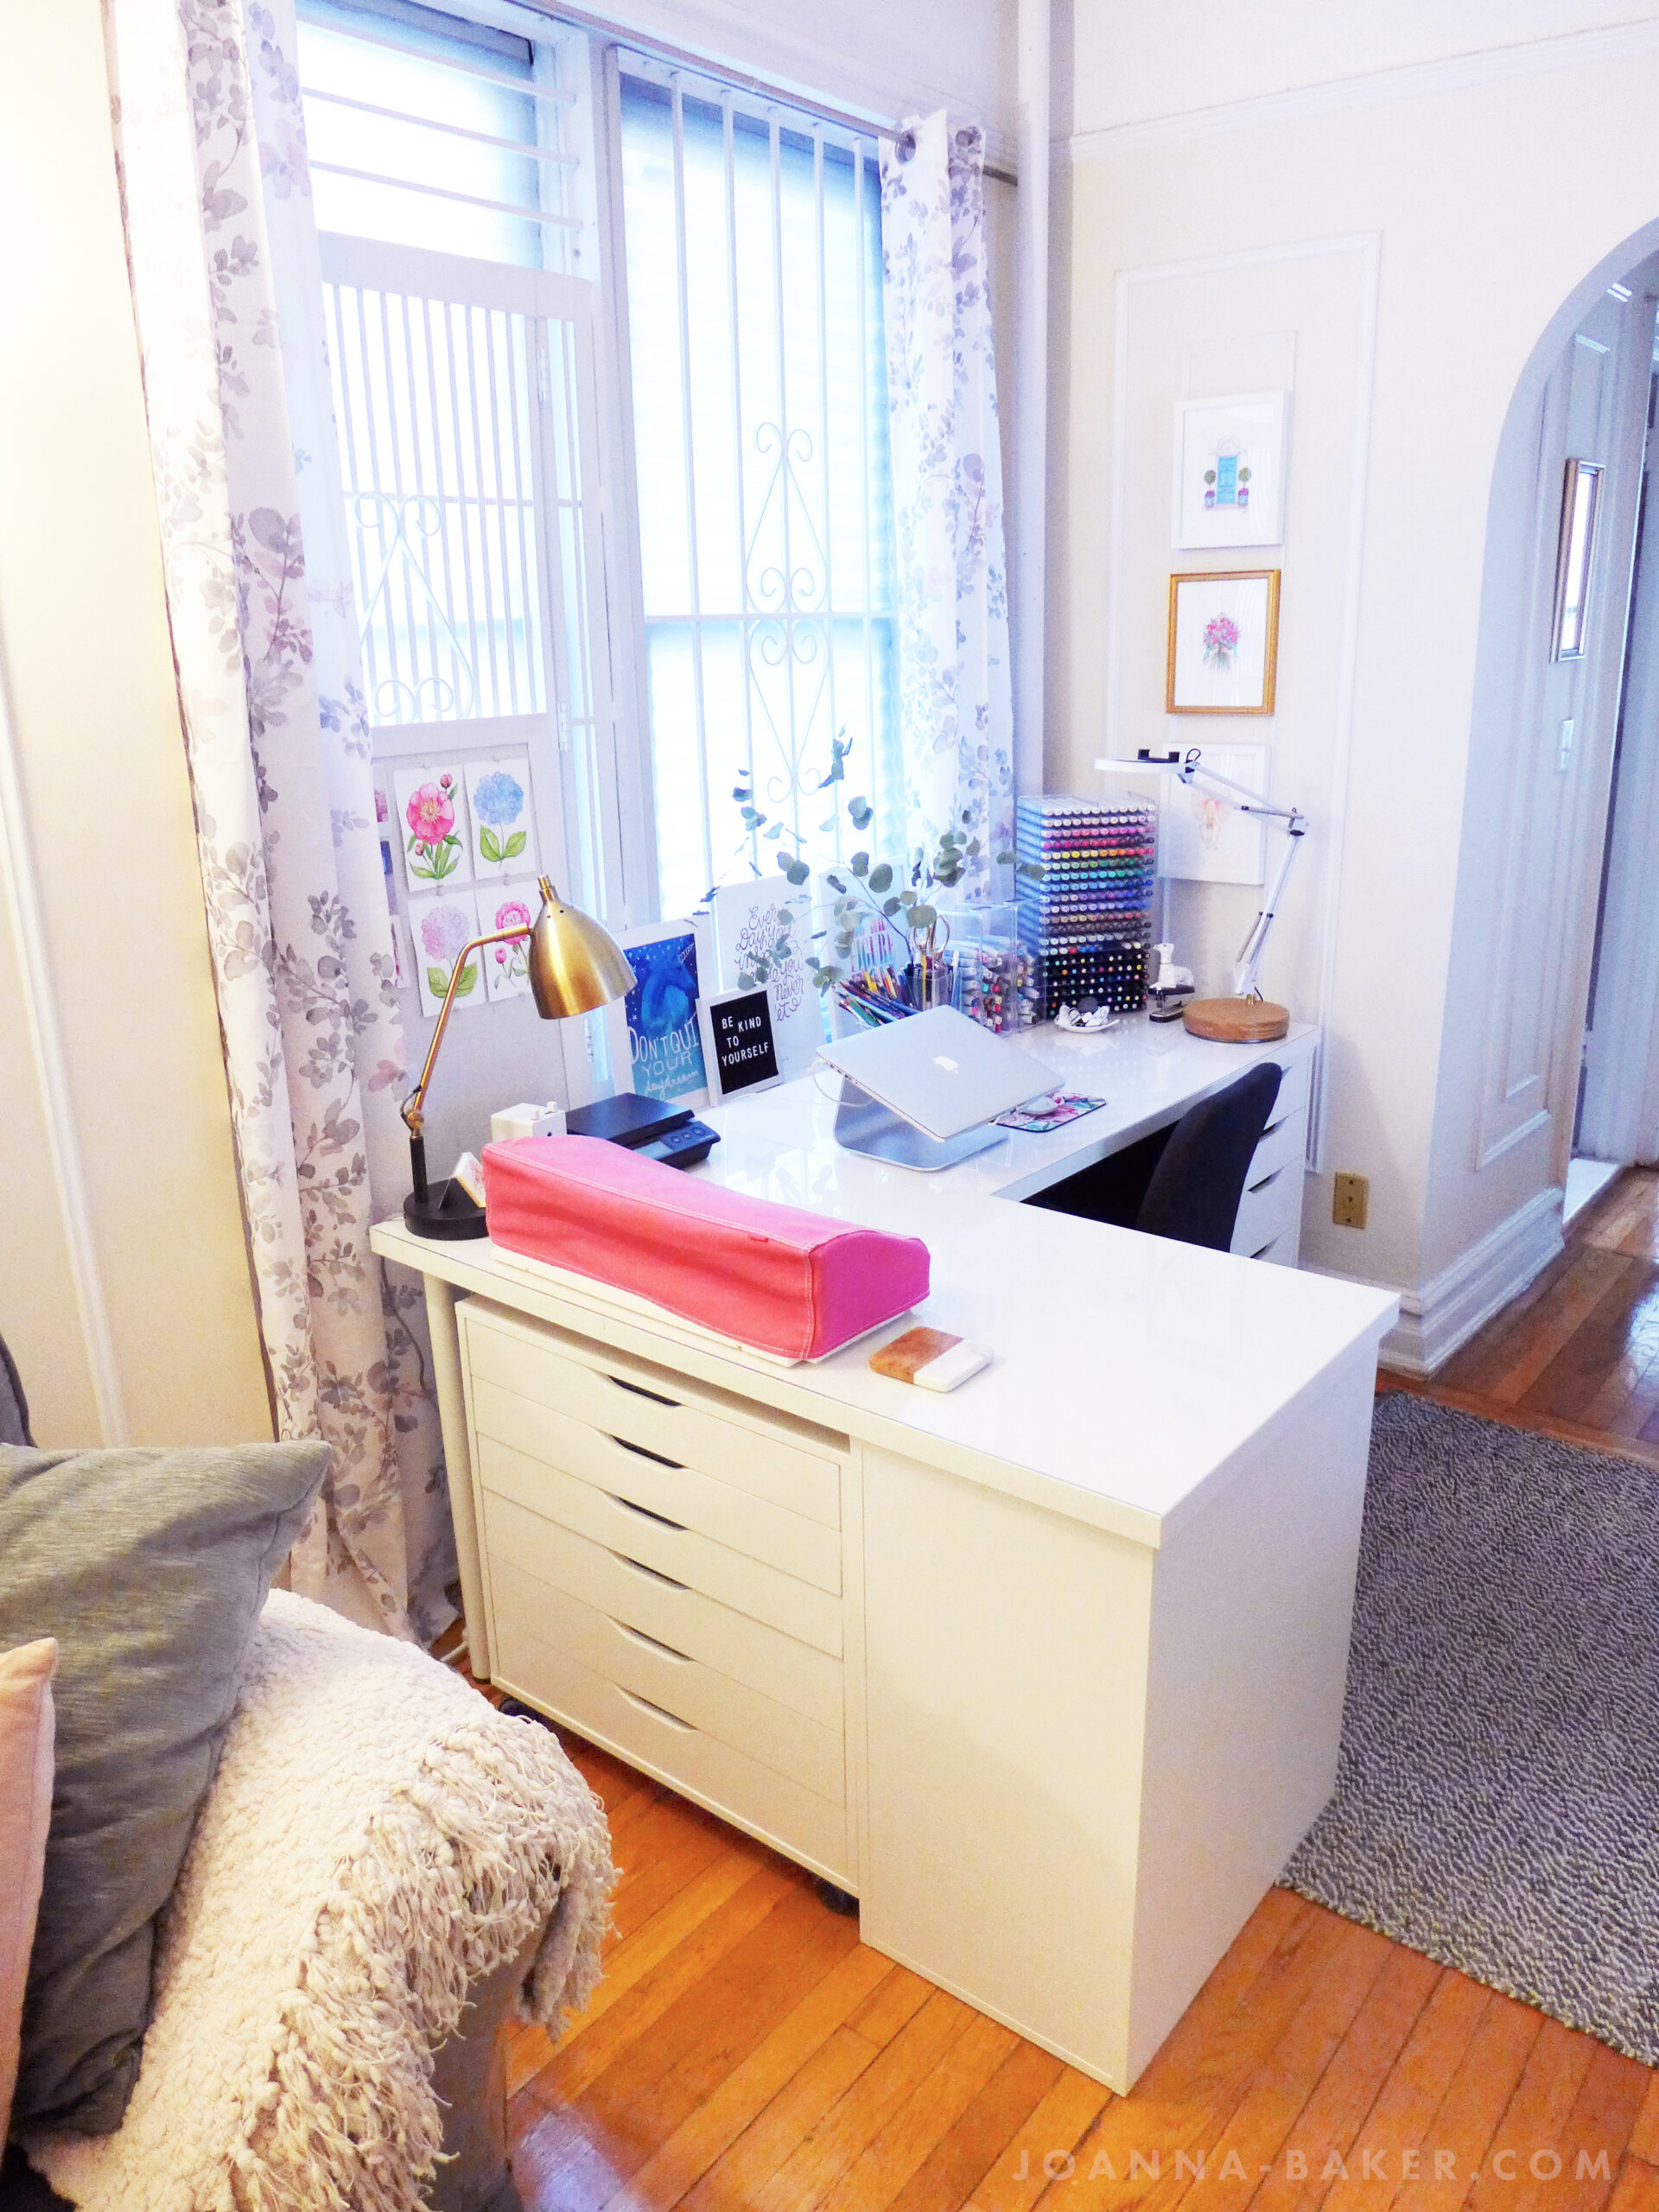
It still fits in the corner of our living room by the windows and is a pretty substantial space given the footprint. I have everything I need to create beautiful artwork and store all the supplies. None of the below links are sponsored by the way, I just want to share what I’ve found that helps me stay organized and inspired without taking up too much space!

I’ve compiled my top 10 tips for carving out your own creative nook in a small space. Here are a few things I’ve learned over the years that have helped me create an organized and inspiring creative workspace in a one-bedroom apartment:
1. Find a little spot.
It can be the corner of a room, a bit of extra space on a landing at the top of the steps, or a small space underneath a window. The closer you are to natural light, the better but don’t worry if a window is not available – see tip #5.
2. Give yourself a flat drawing space.
It doesn’t have to be anything fancy, either a desk or simple table will work. Ikea makes super affordable options that work well and you can always add on to them later. Thrift stores and antique malls also tend to have small tables for a bargain.
3. Get creative with storage.
Ikea to the rescue again! In my current set up, I have 2 Linnmon tables placed perpendicular to form an L. One side of each table has the Alex drawers and then I purchased the wider Alex drawer unit on casters to slide underneath one of tables for additional storage. There is ample space for art supplies and finished artwork so things don’t pile up and I can keep my desk free and clear to create.
4. Protect your workspace.
Plexiglas is an affordable way to protect your table top. You can find it for pretty cheap at your local hardware store and have them cut it down to the exact size of your desk. (Regular glass works too but will be more expensive).
5. Locate your light source.
If you don’t have any natural light to work with or even if you do and you prefer drawing in the evenings, getting two desk lamps that either clip on or have a smaller footprint and the necks can swivel so you can adjust the direction of the light. I recently switched to daylight bulbs and they work WONDERS in providing a nice clean light source (no ugly yellow cast) that helps provide bright light to work under.
6. Diffuse your light.
Creating and taking photos of your work is a lot easier under soft light. It’s difficult to see what you’re doing if you’re drawing directly in a sunbeam or have super bright lights pointing directly at your work. Adding white shades or curtains in front of windows to diffuse the light works great. If you’re using daylight bulbs, consider adding diffuser socks to lamps and point them up towards the ceiling so that the light bounces off the rest of the room and reflects back. I use these socks on my desk lamps and they diffuse the light beautifully.
7. Hang your art.
What better place to display your own work than in your studio?? If you have some wall space near your table or desk, why not pick up some vintage frames or search for more modern frames at HomeGoods and Target to frame your work and create a vibe for your space? And if wall space isn’t an option, you can always lean some framed art on a ledge, windowsill, or along the edge of your desk.
8. Find a comfy chair.
This one – I’ll admit – I’m still working on, but it really is important. When looking for a chair, I went the pretty route and wanted one that looked good first and was comfortable second. If you’re like me and you want a pretty chair but it doesn’t provide enough cushioning or support, consider getting an ergonomic cushion to sit on. Or you could just get an actually comfy chair. =)
9. Grow your space with your art.
Start small with just the basics – a table and bins on your table top for storing supplies will suffice. As you acquire more art supplies and produce more work, see how much storage you can add as you go. The Linnmon table legs are removable and can be replaced with the Alex drawer set. Or you could add a little art cart next to your table to organize your supplies. There are lots of ways to add storage underneath your table and on top of it without increasing the overall size of your studio space.
10. Set the mood
When you’re working in a small space, there usually isn’t too much room for decorations. But creating a mood board with inspiring images and quotes to keep you motivated is a great way to set the tone for your space and keep you energized to create. Just lean it up against the edge of your desk or hang a small one on the wall if you have space. Fresh flowers on my desk and a lovely scented candle lit nearby always brighten up the space too.
I hope this post encourages you to designate a creative space of your own in your home no matter the size, and if you do, I want to see it! Tag me on Instagram when you share it, I love seeing creative spaces!
xoxo

Pingback: Don’t Have Space or Fancy Tools to Create? Start with the Basics… | Joanna Baker : Fashion & Lifestyle Illustrations