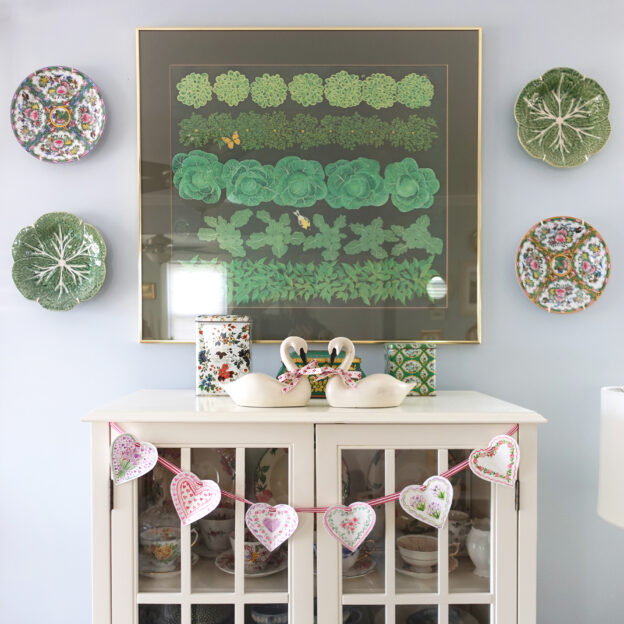
Lately I’ve been feeling the pull to create just for the sake of creating. Usually after the holiday season, it takes awhile for my creative spark to return but this year I’ve felt a desire to make lots of things. Perhaps it’s my mind’s way of regulating my nervous system in these especially volatile times. Or maybe it’s in an effort to ward off the winter blues and make our home more cheerful. Either way, this extra dose of inspiration is a welcome change and I’m hoping it continues. If you’re in a crafty mood too and are looking for something delightful to make, might I suggest these lovely, painted paper hearts turned into festive Valentine’s Day garland…
To create the garland I used:*
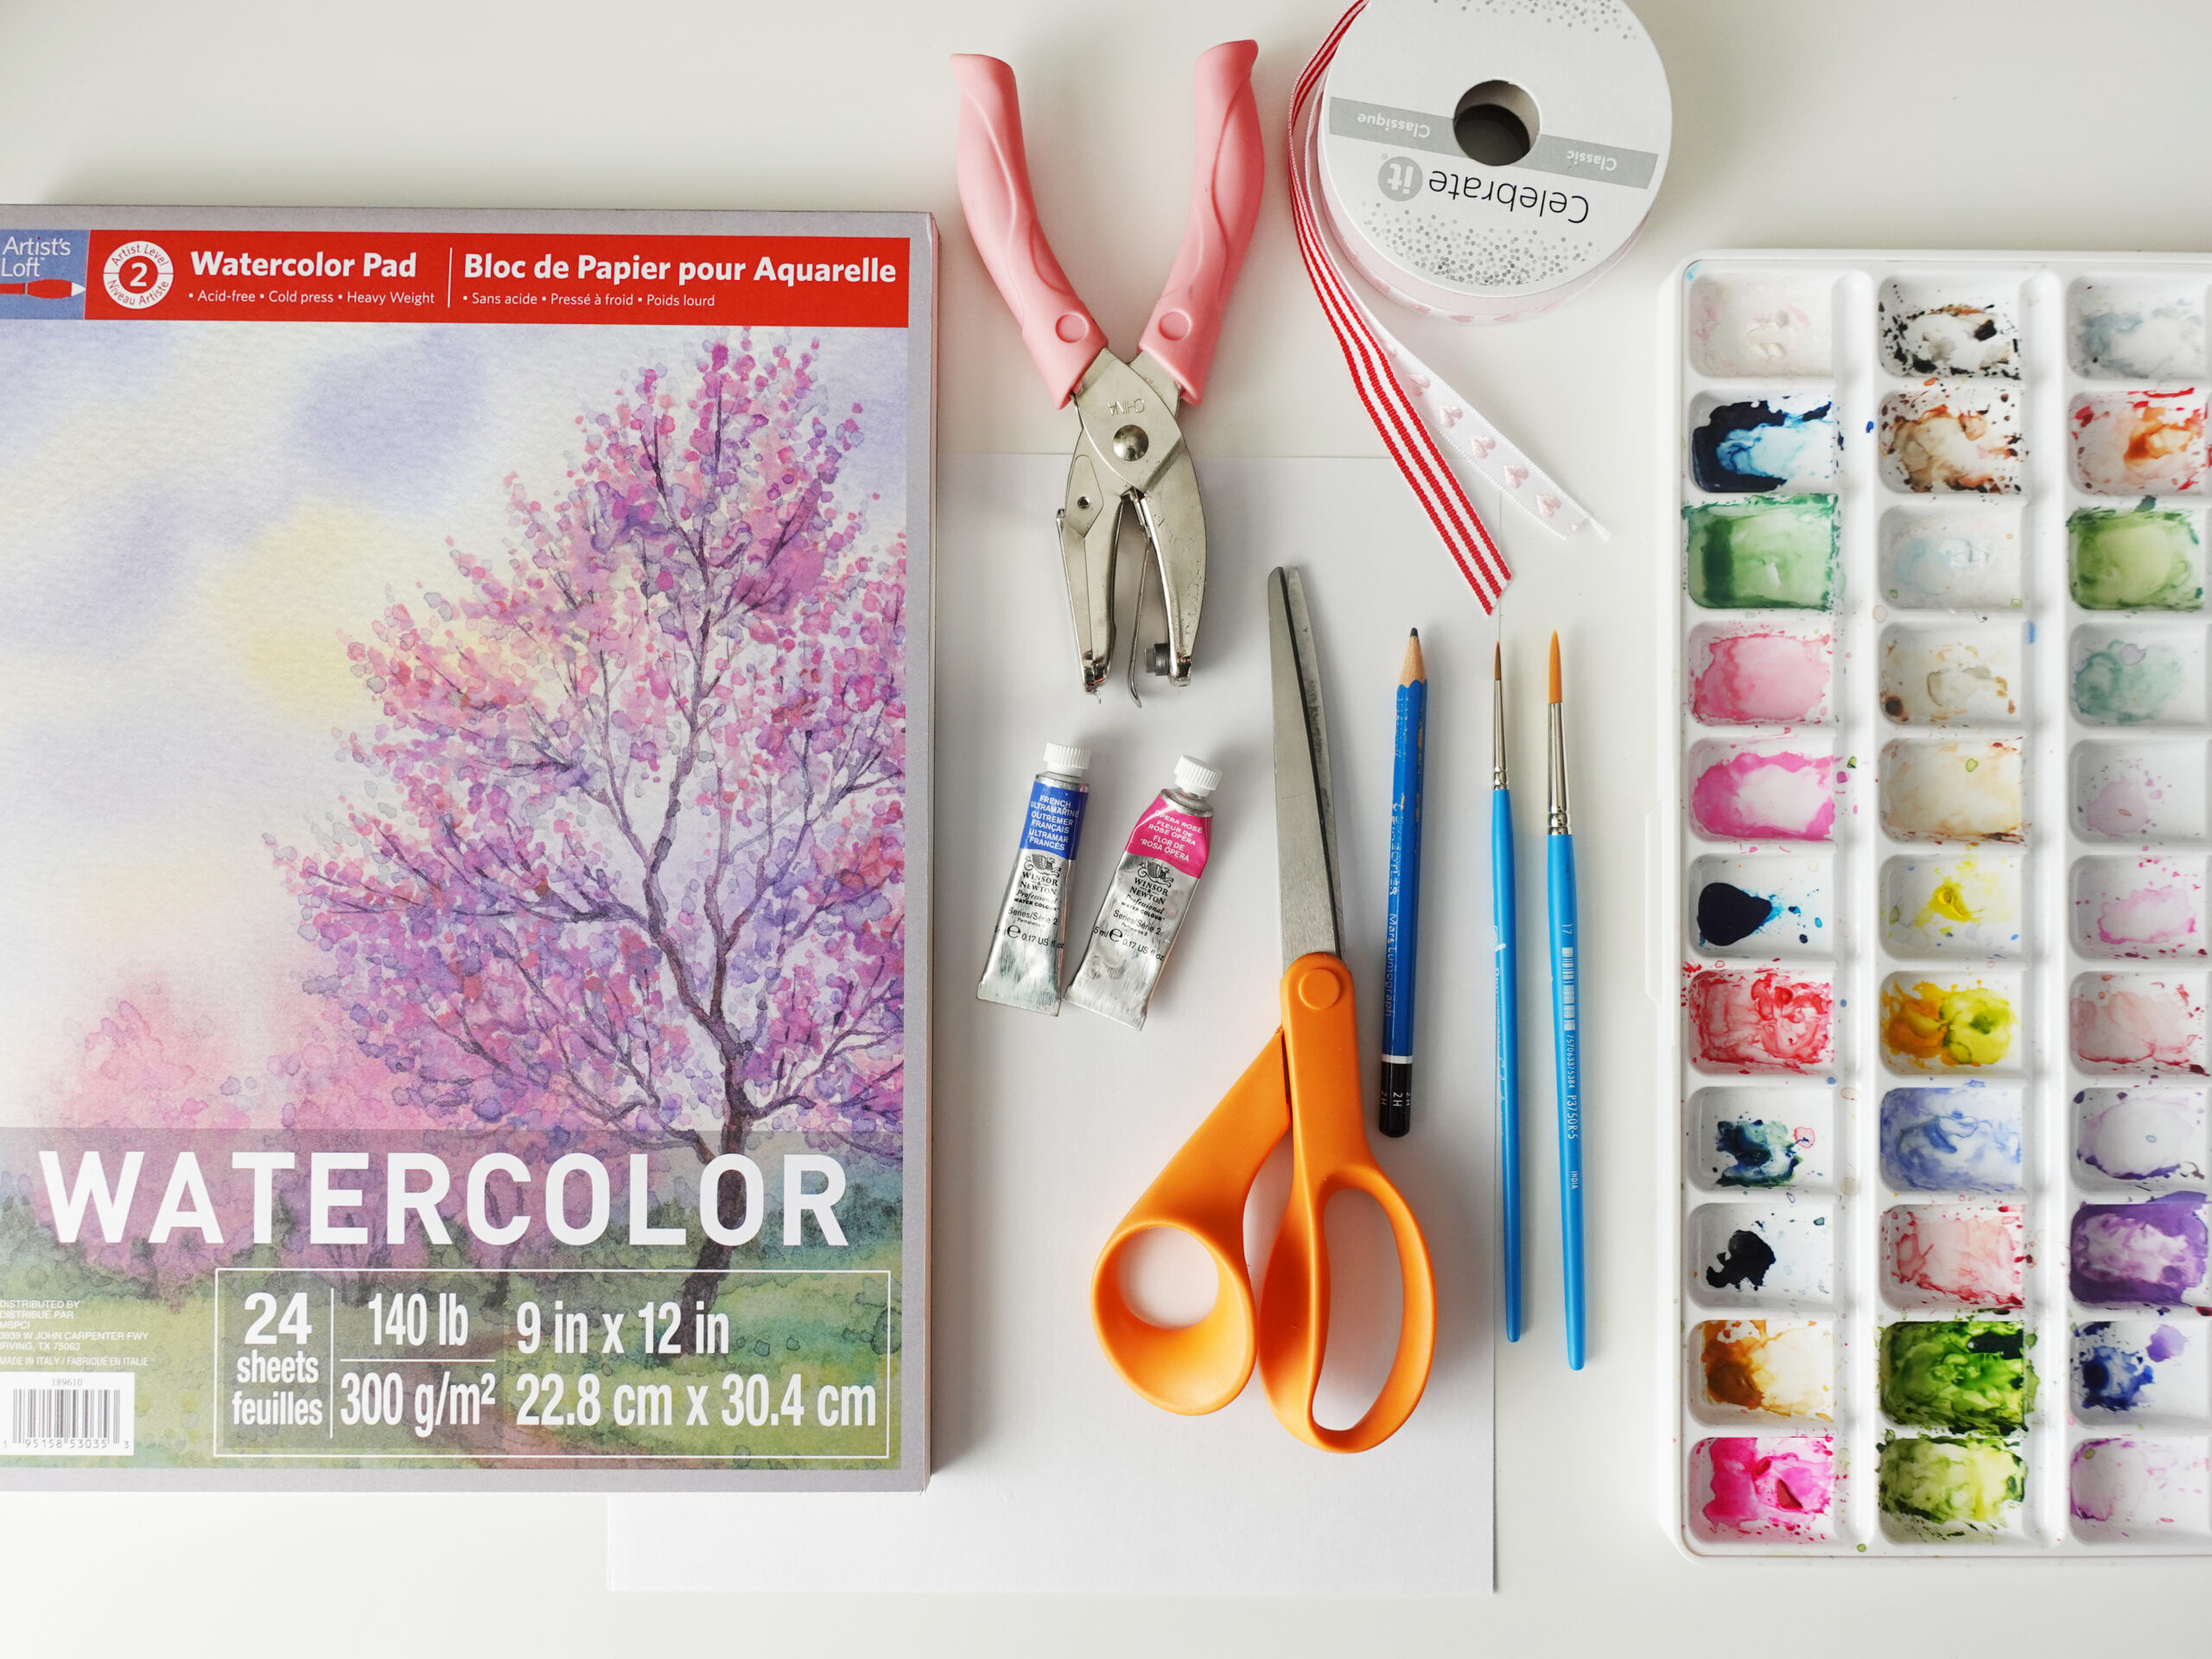
- Watercolor Paper – I used this 9×12 pad but any watercolor paper will do! Even better if it’s on the thinner side so it’s easier to fold.
- Pencil
- Scissors
- Small paint brushes – here are my favorites
- Watercolors – I have a set similar to this and also love these but you can also use a cheaper set like this
- Paint palette – this is one of my favorites
- A sheet of card stock
- 3/8″ wide fancy ribbons – this is the one I used but this one is super cute too
- Hole punch – I used a slot punch to better fit the ribbon but a regular round punch will do
- Cup of water
- Paper towels
* May contain affiliate links
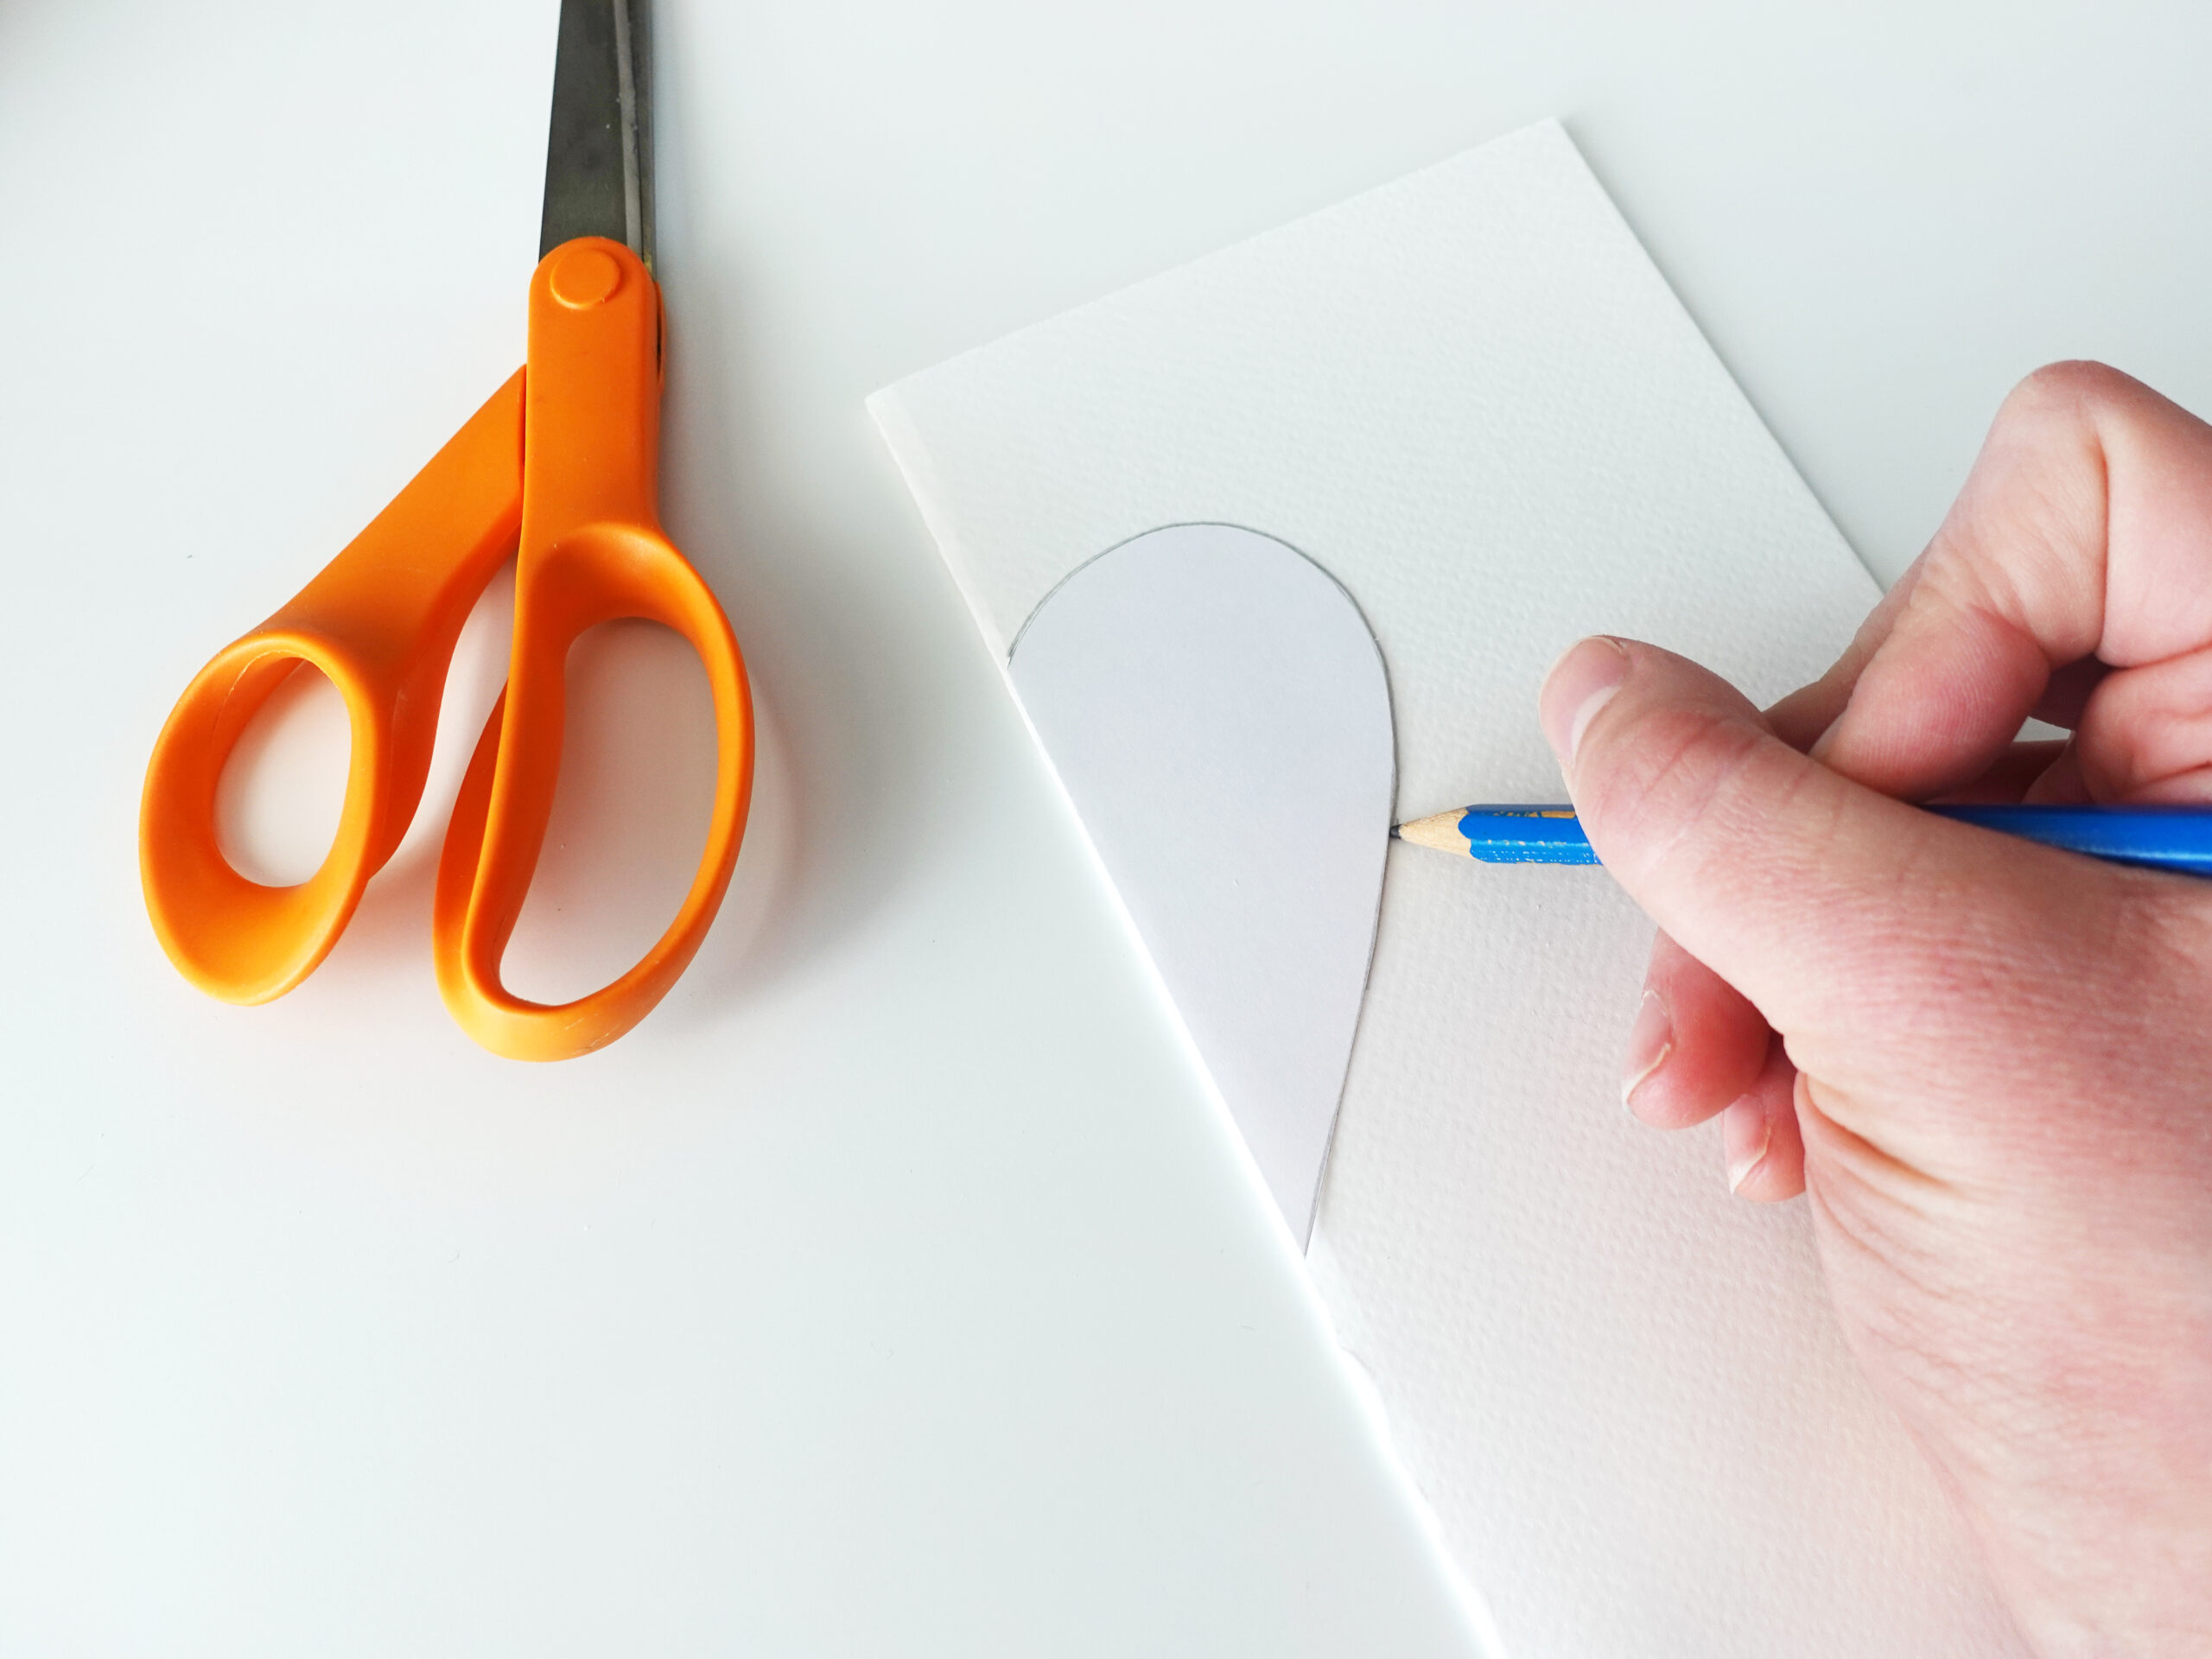
Start by free hand sketching out a half heart shape along the edge of a sheet of card stock. Next, cut it out – this will serve as your heart template. My heart template was just under 4″ tall. Fold a sheet of watercolor paper in half length wise. Align your template along the fold and trace the heart shape. I was able to fit three hearts on each sheet of watercolor paper and made a total of six hearts. But feel free to make more depending on the length you want for your garland!


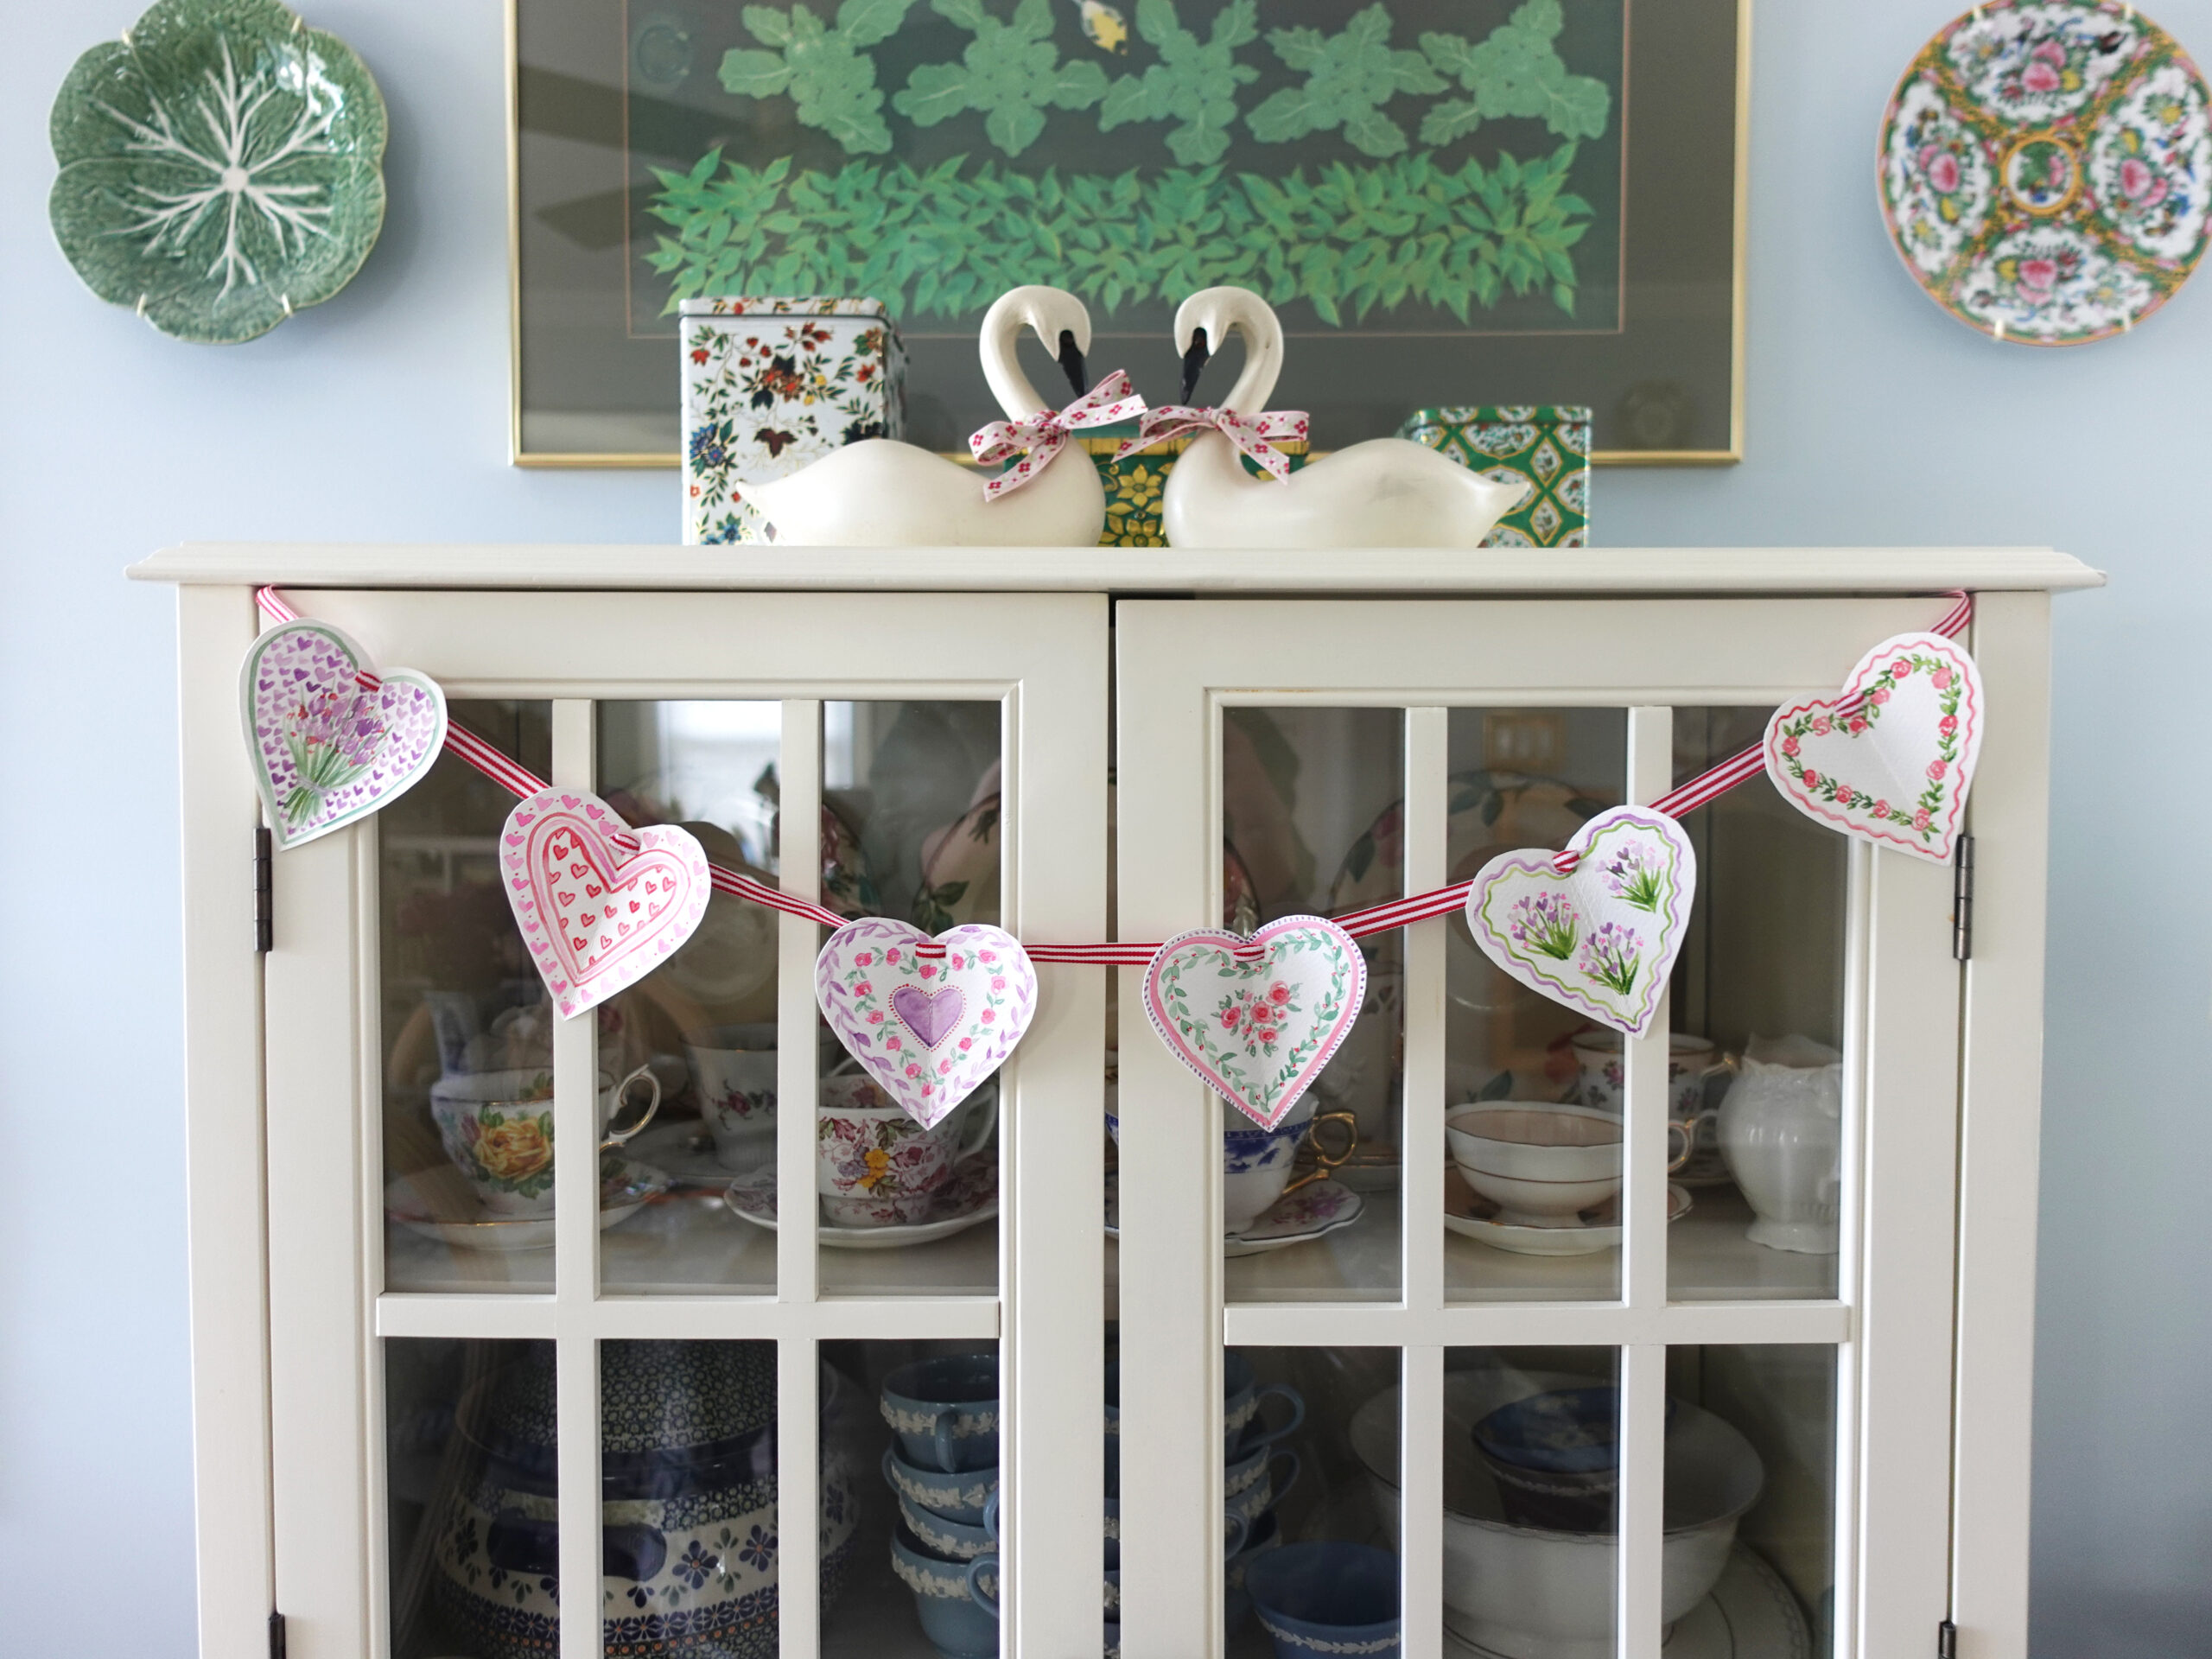
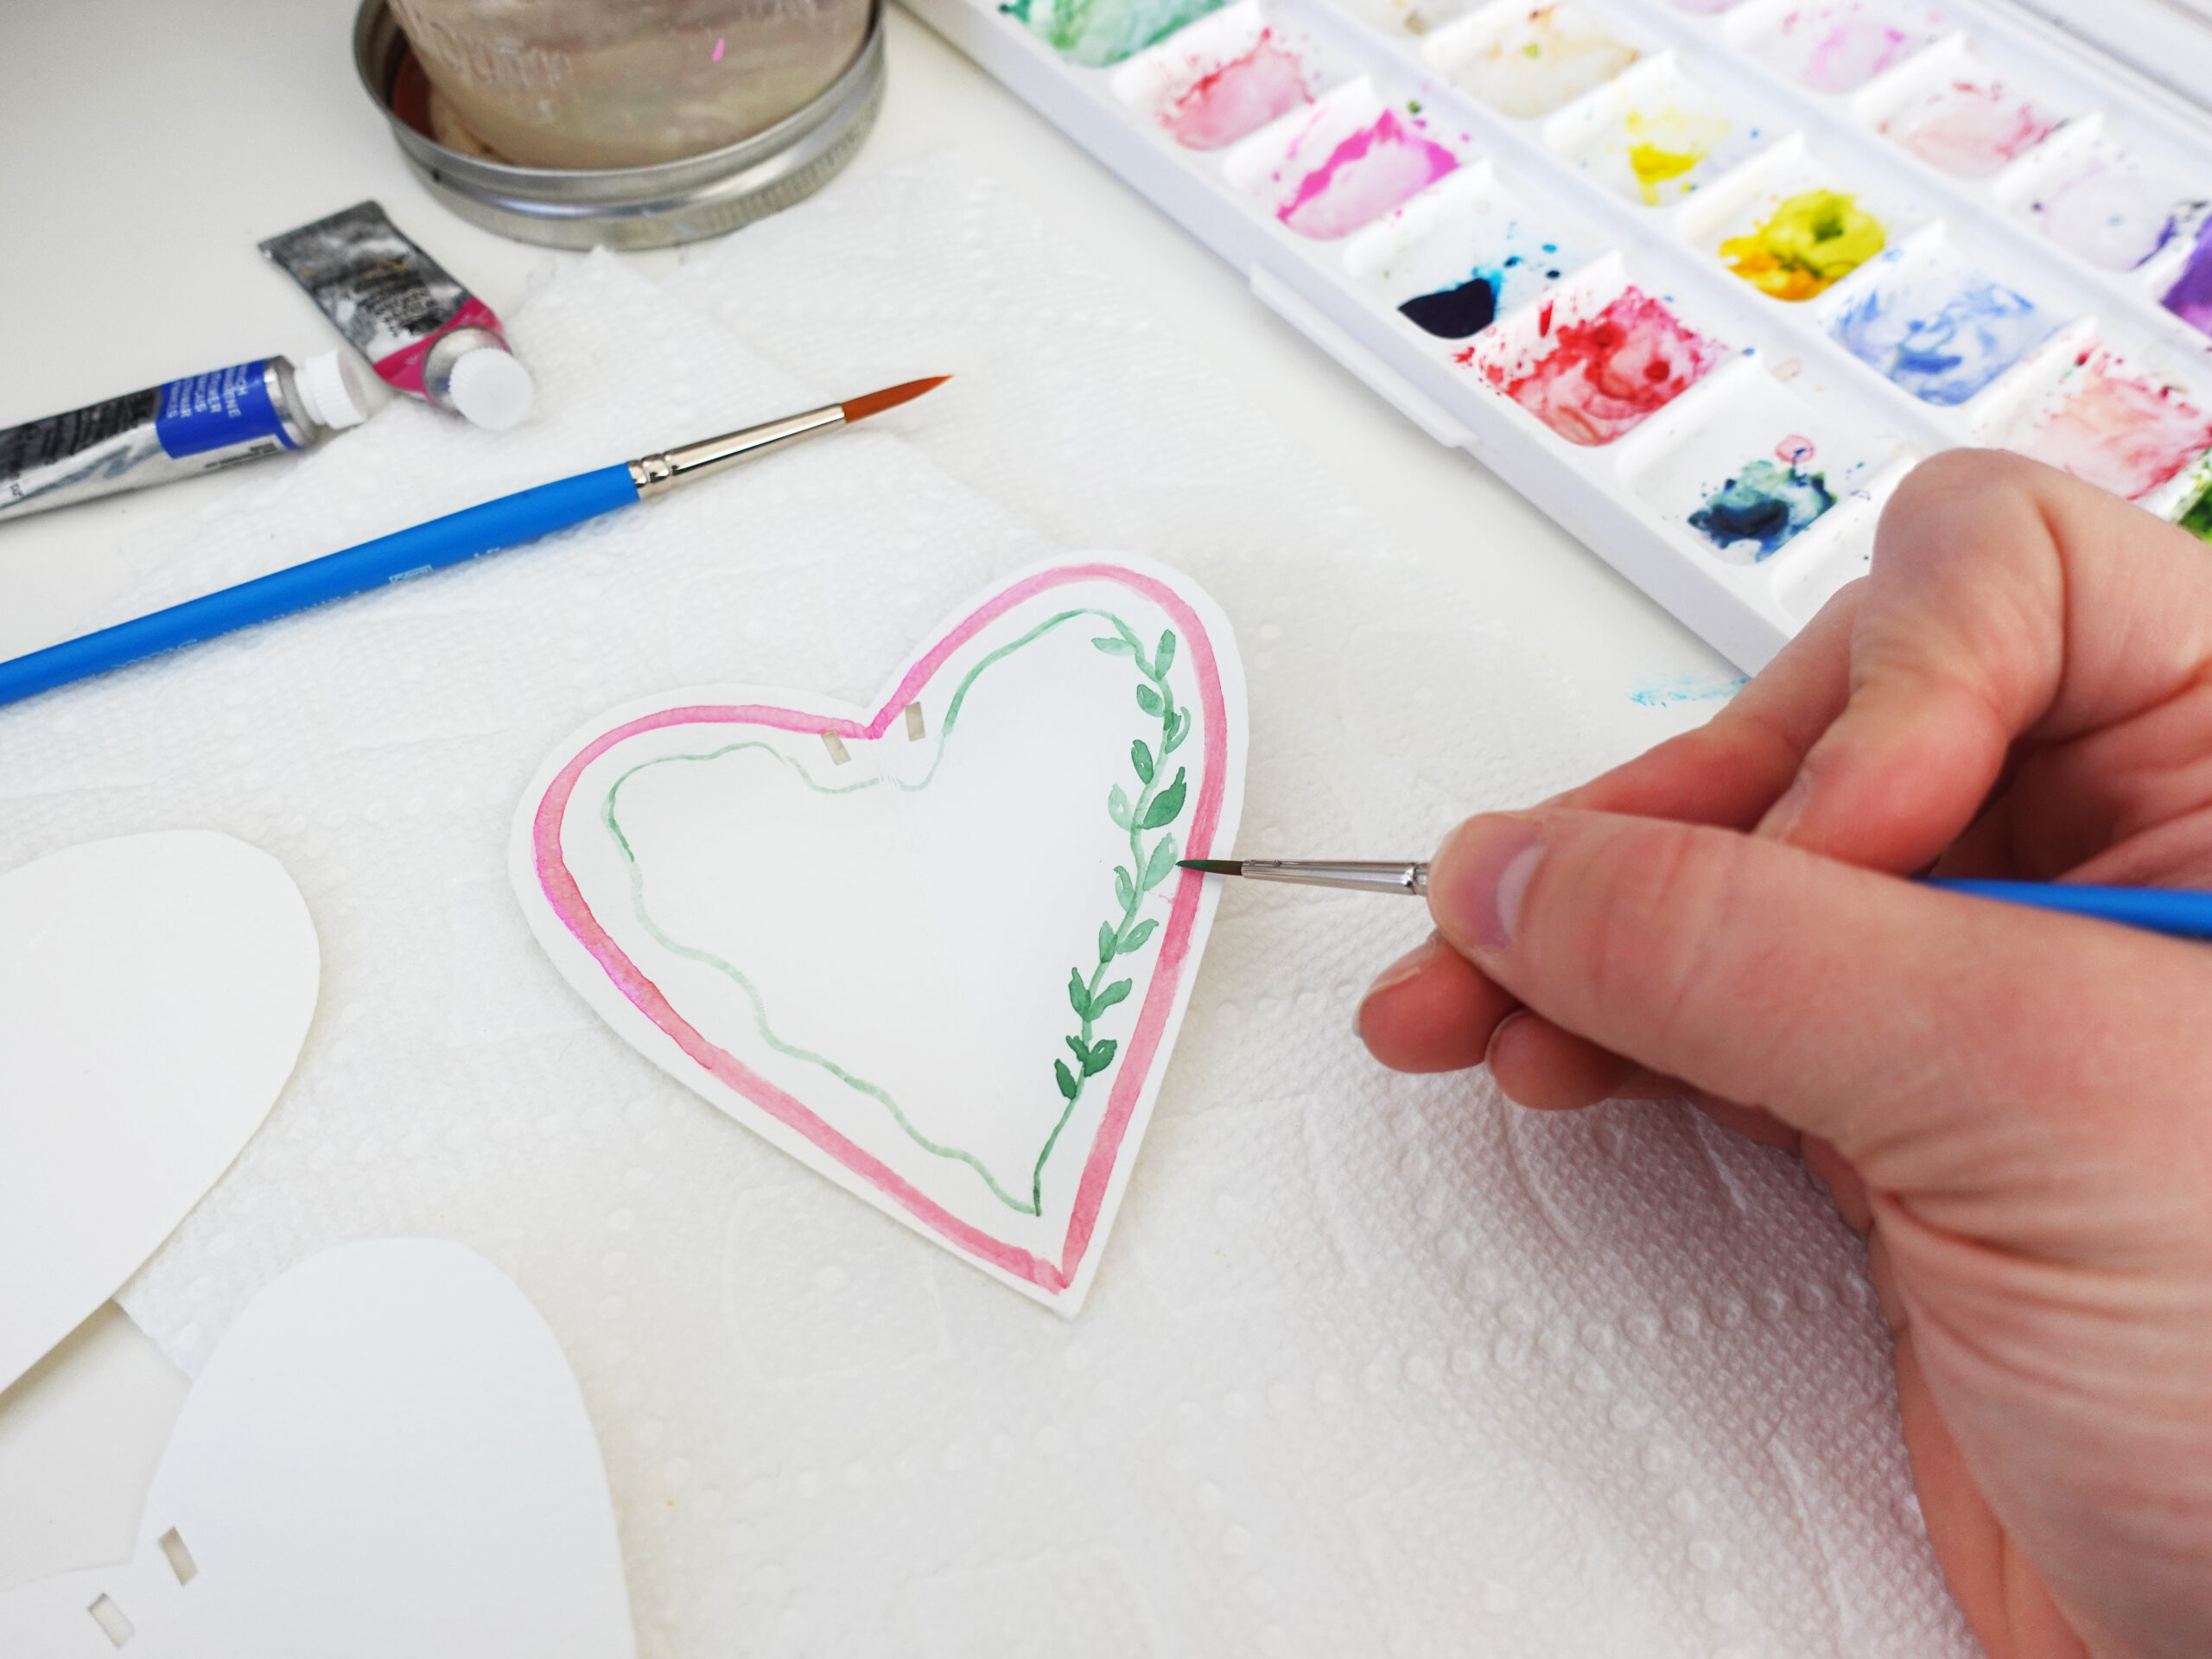
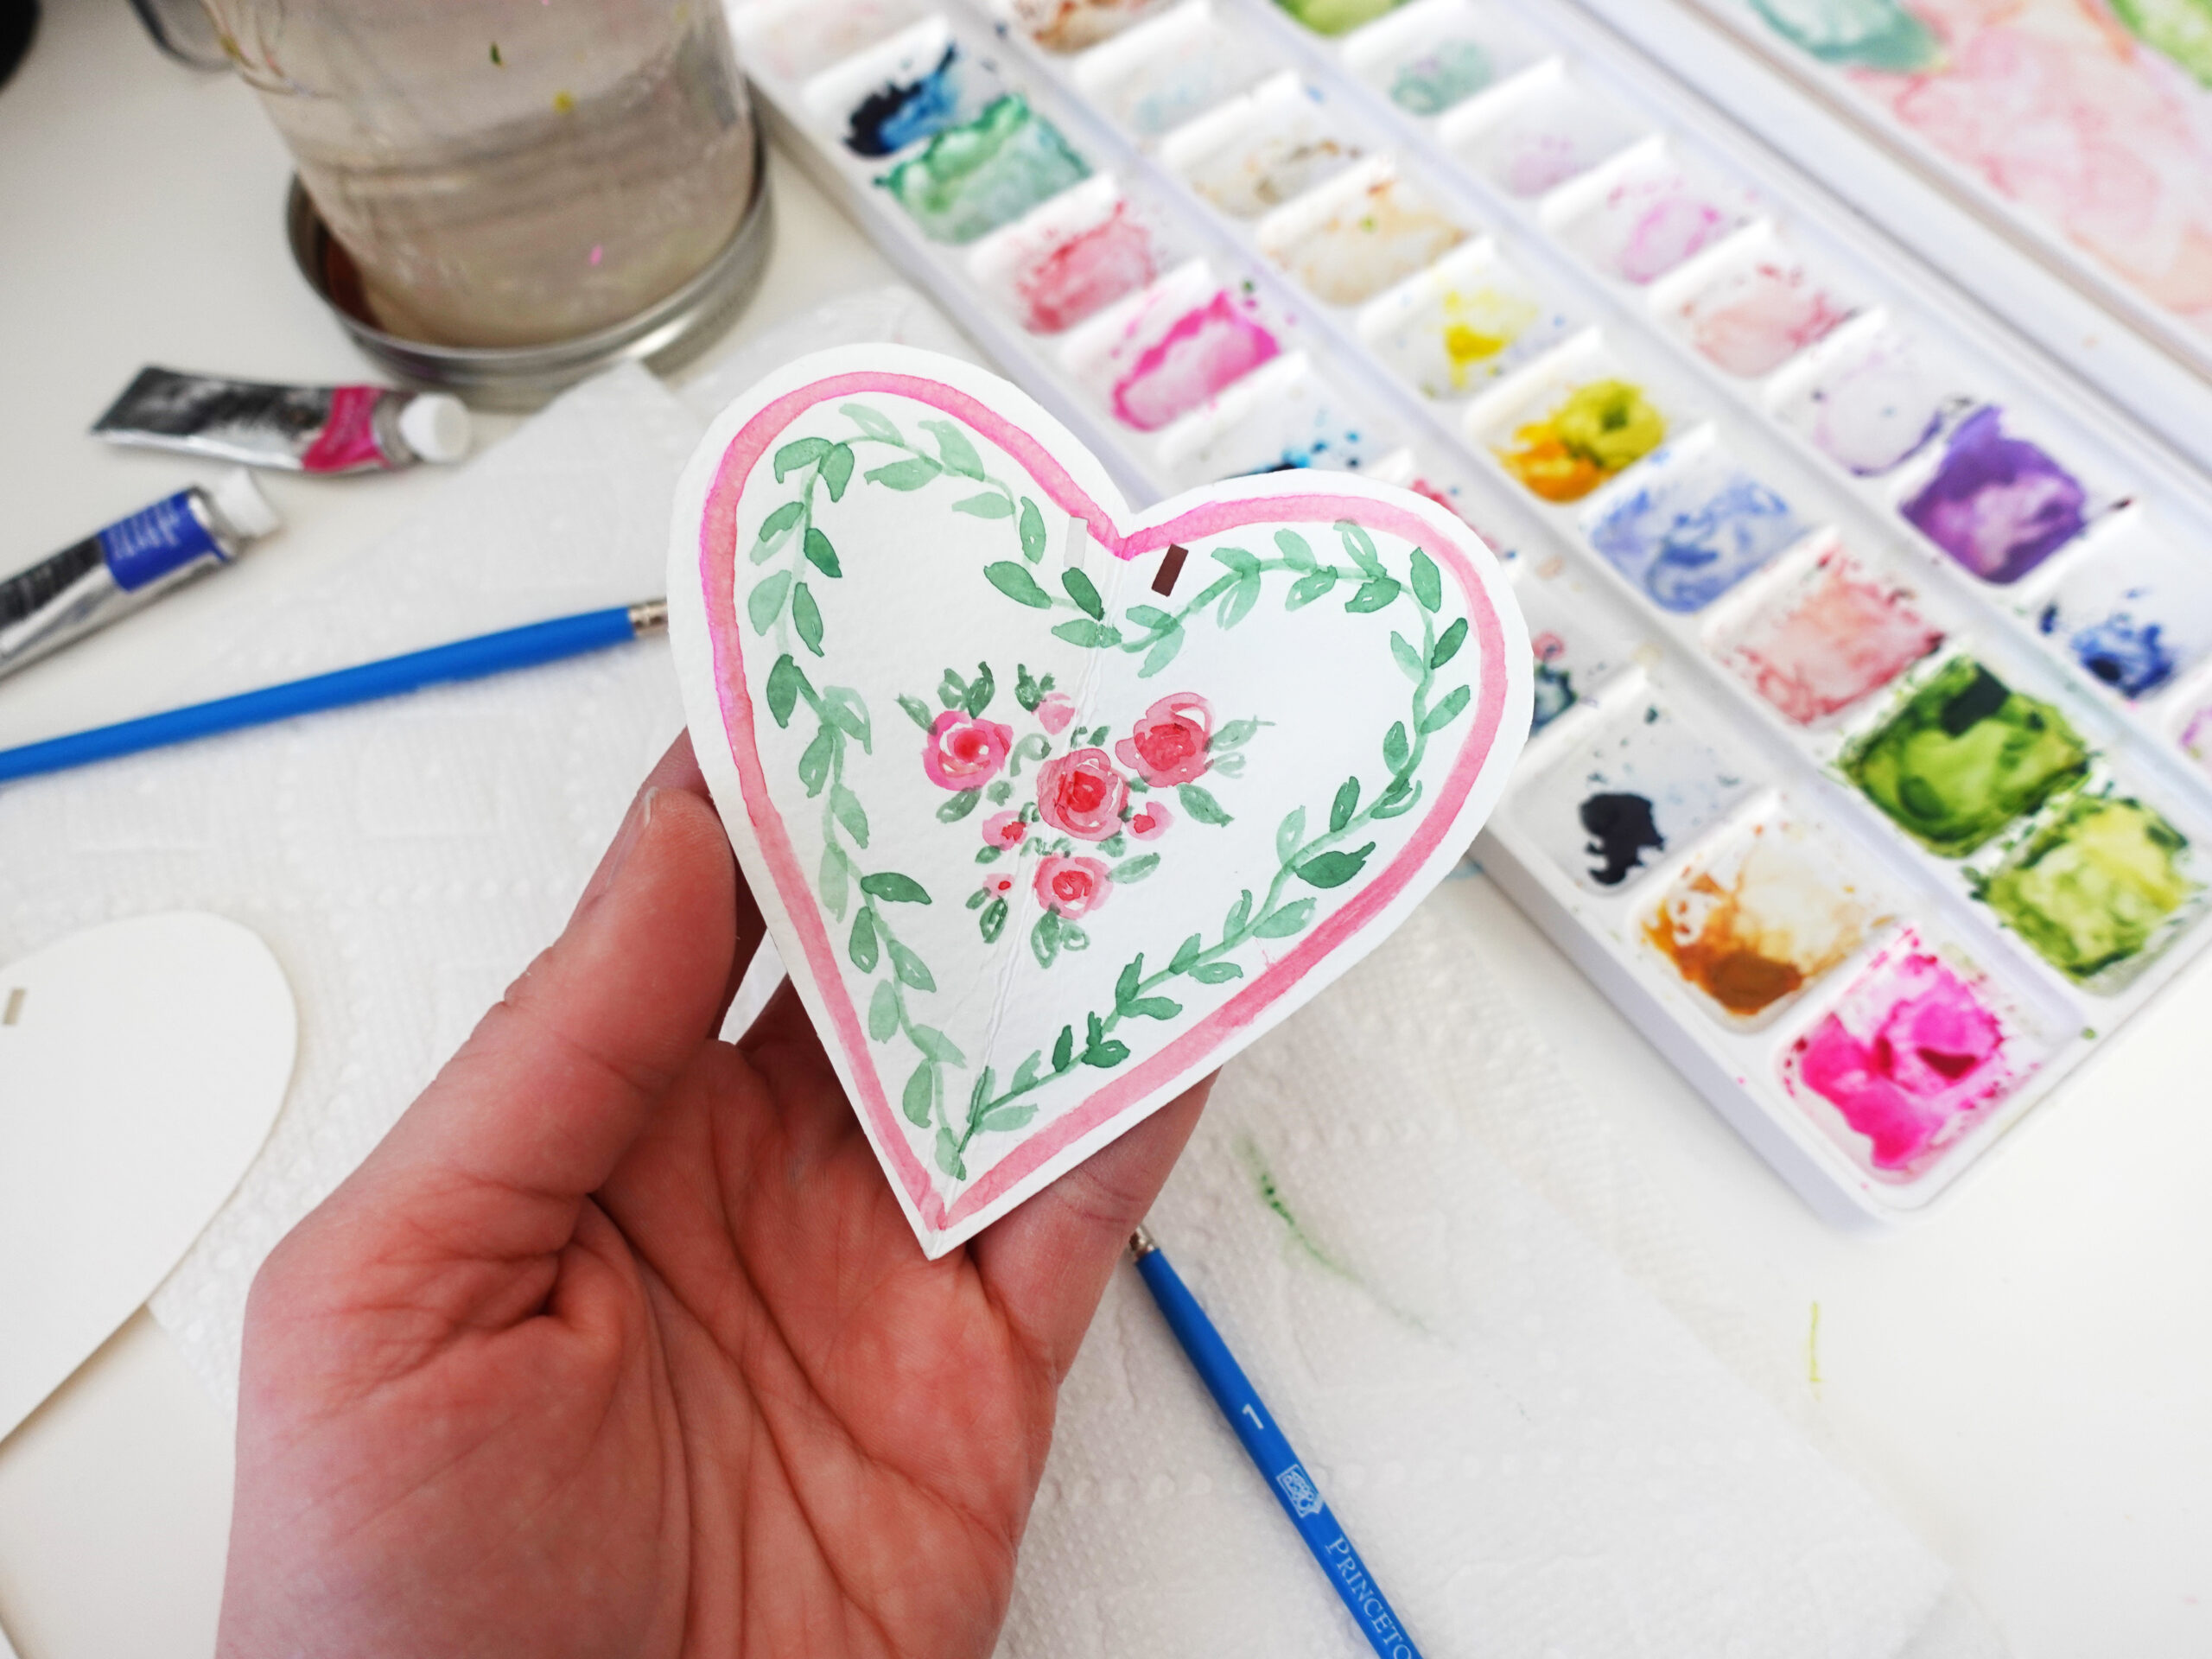
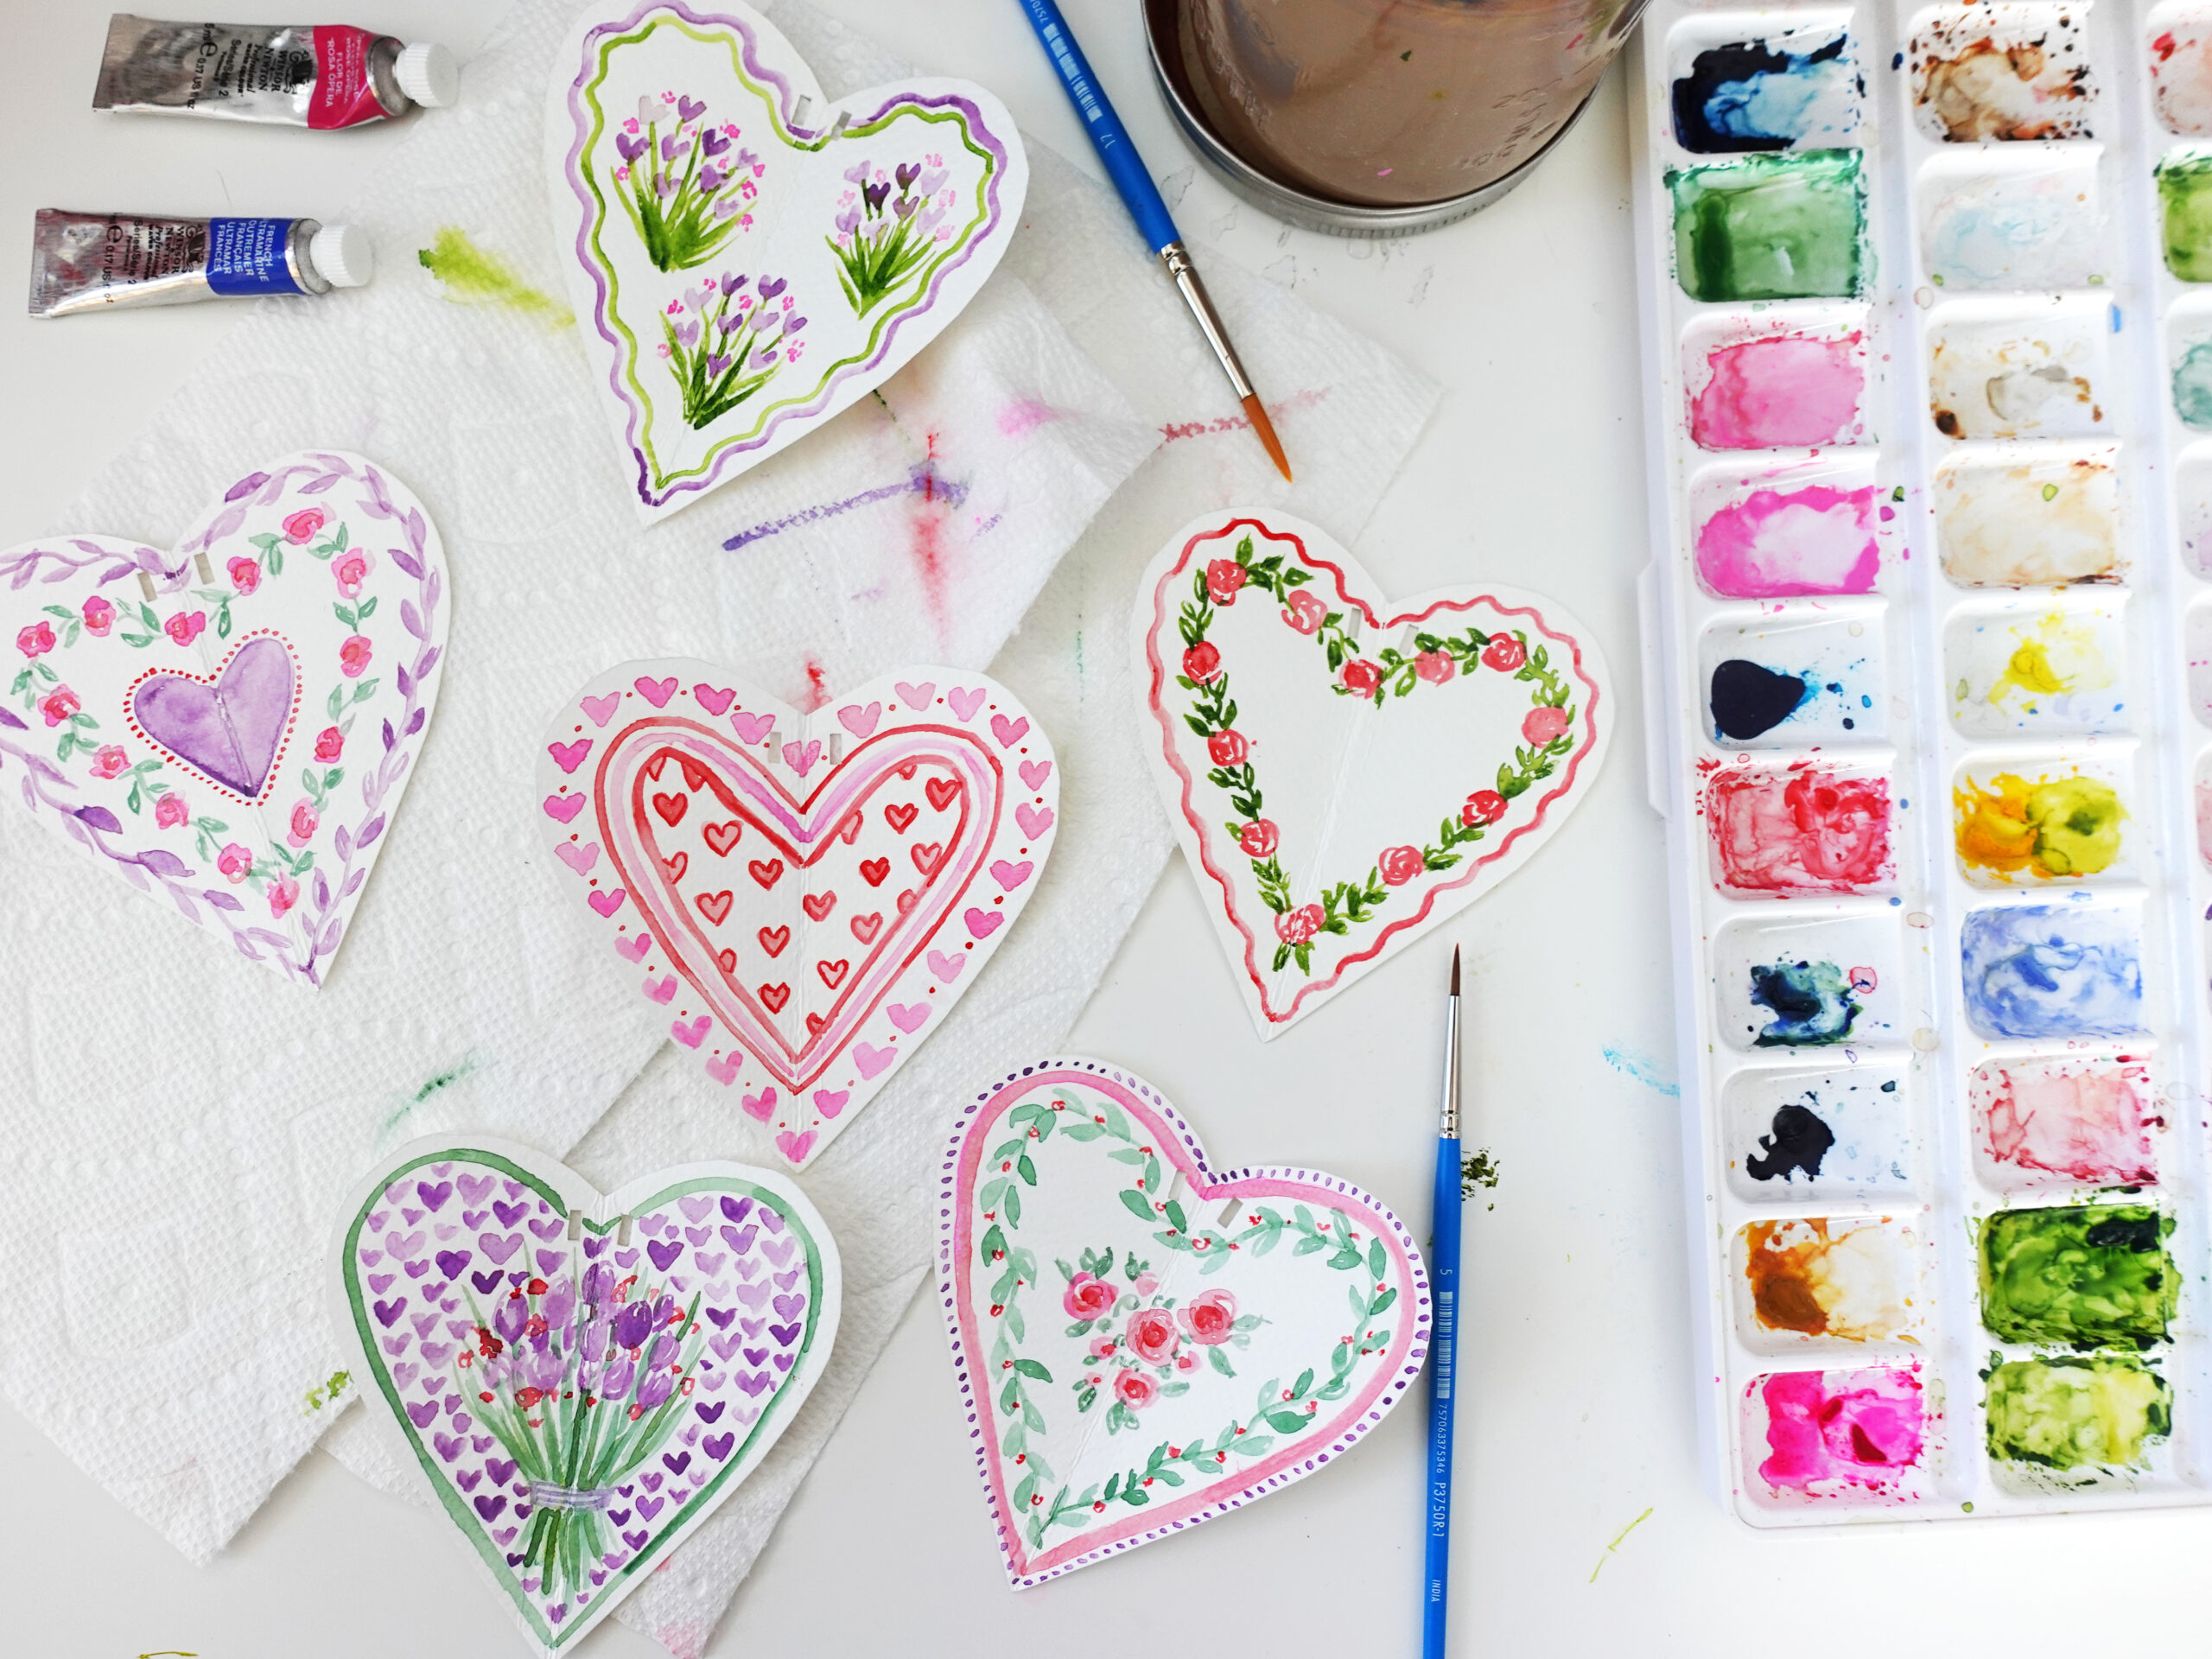
After each heart is cut out, fold it in half and punch a slatted hole through the top. Be careful not to punch too close to the edge of the heart as this will make the holes too fragile when it comes time to string the garland. After all the holes are punched, it’s time to whip out your paints and start decorating! I chose a limited color palette of pinks, greens, reds, and purples. For a cohesive look, you’ll want to repeat colors in your designs to help bring them all together. I painted my go-to motifs of vines and roses but added lots of tiny hearts too. I love that each design is different but they all work well as a set.
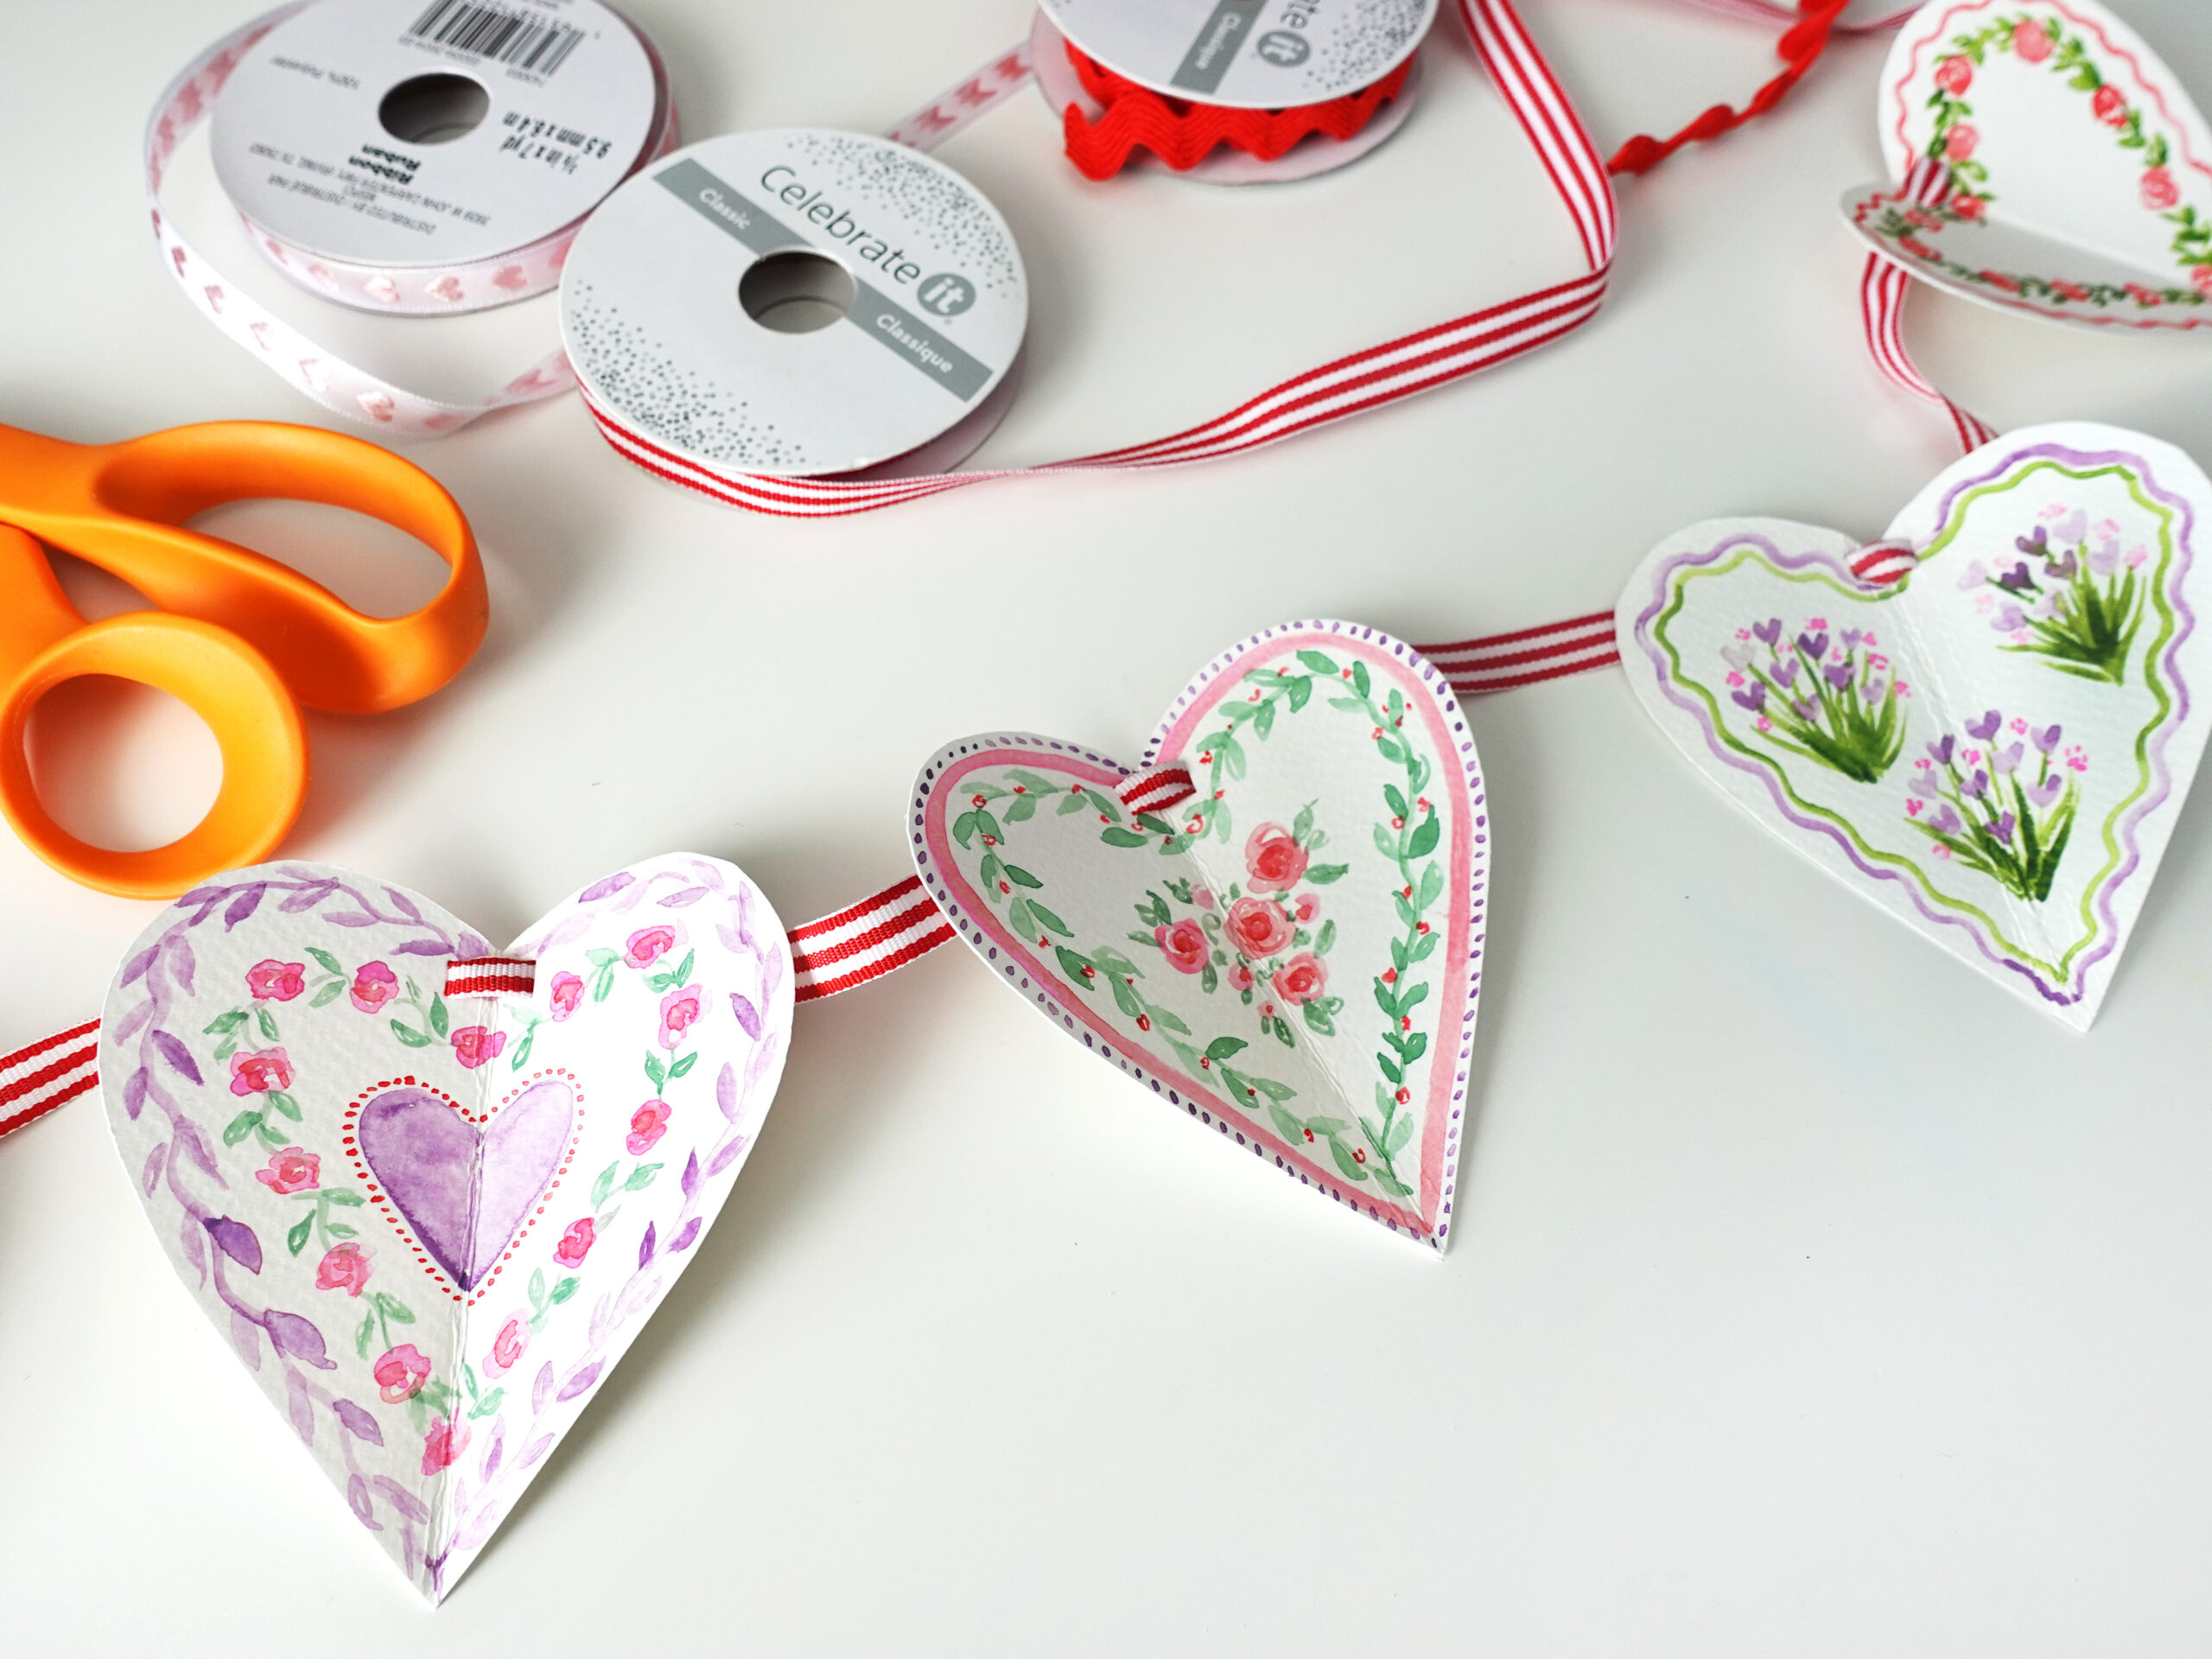
After you’re finished painting, make sure to allow your hearts enough time to thoroughly dry. Next, get ready to string the garland. Carefully feed the ribbon through the slat starting from the back of each heart, around to the front, and then back again. Do not cut the ribbon just yet, leave it on the spool so you have room to adjust the spacing of your hearts. You may want to measure where you plan on hanging your garland to make sure you give yourself enough length. String each paper heart onto the ribbon and re-space as needed. I ended up leaving about 2″ in between each heart. If you’re tying the ends to a railing or post, be sure to leave extra room to tie a box on either end of your garland.
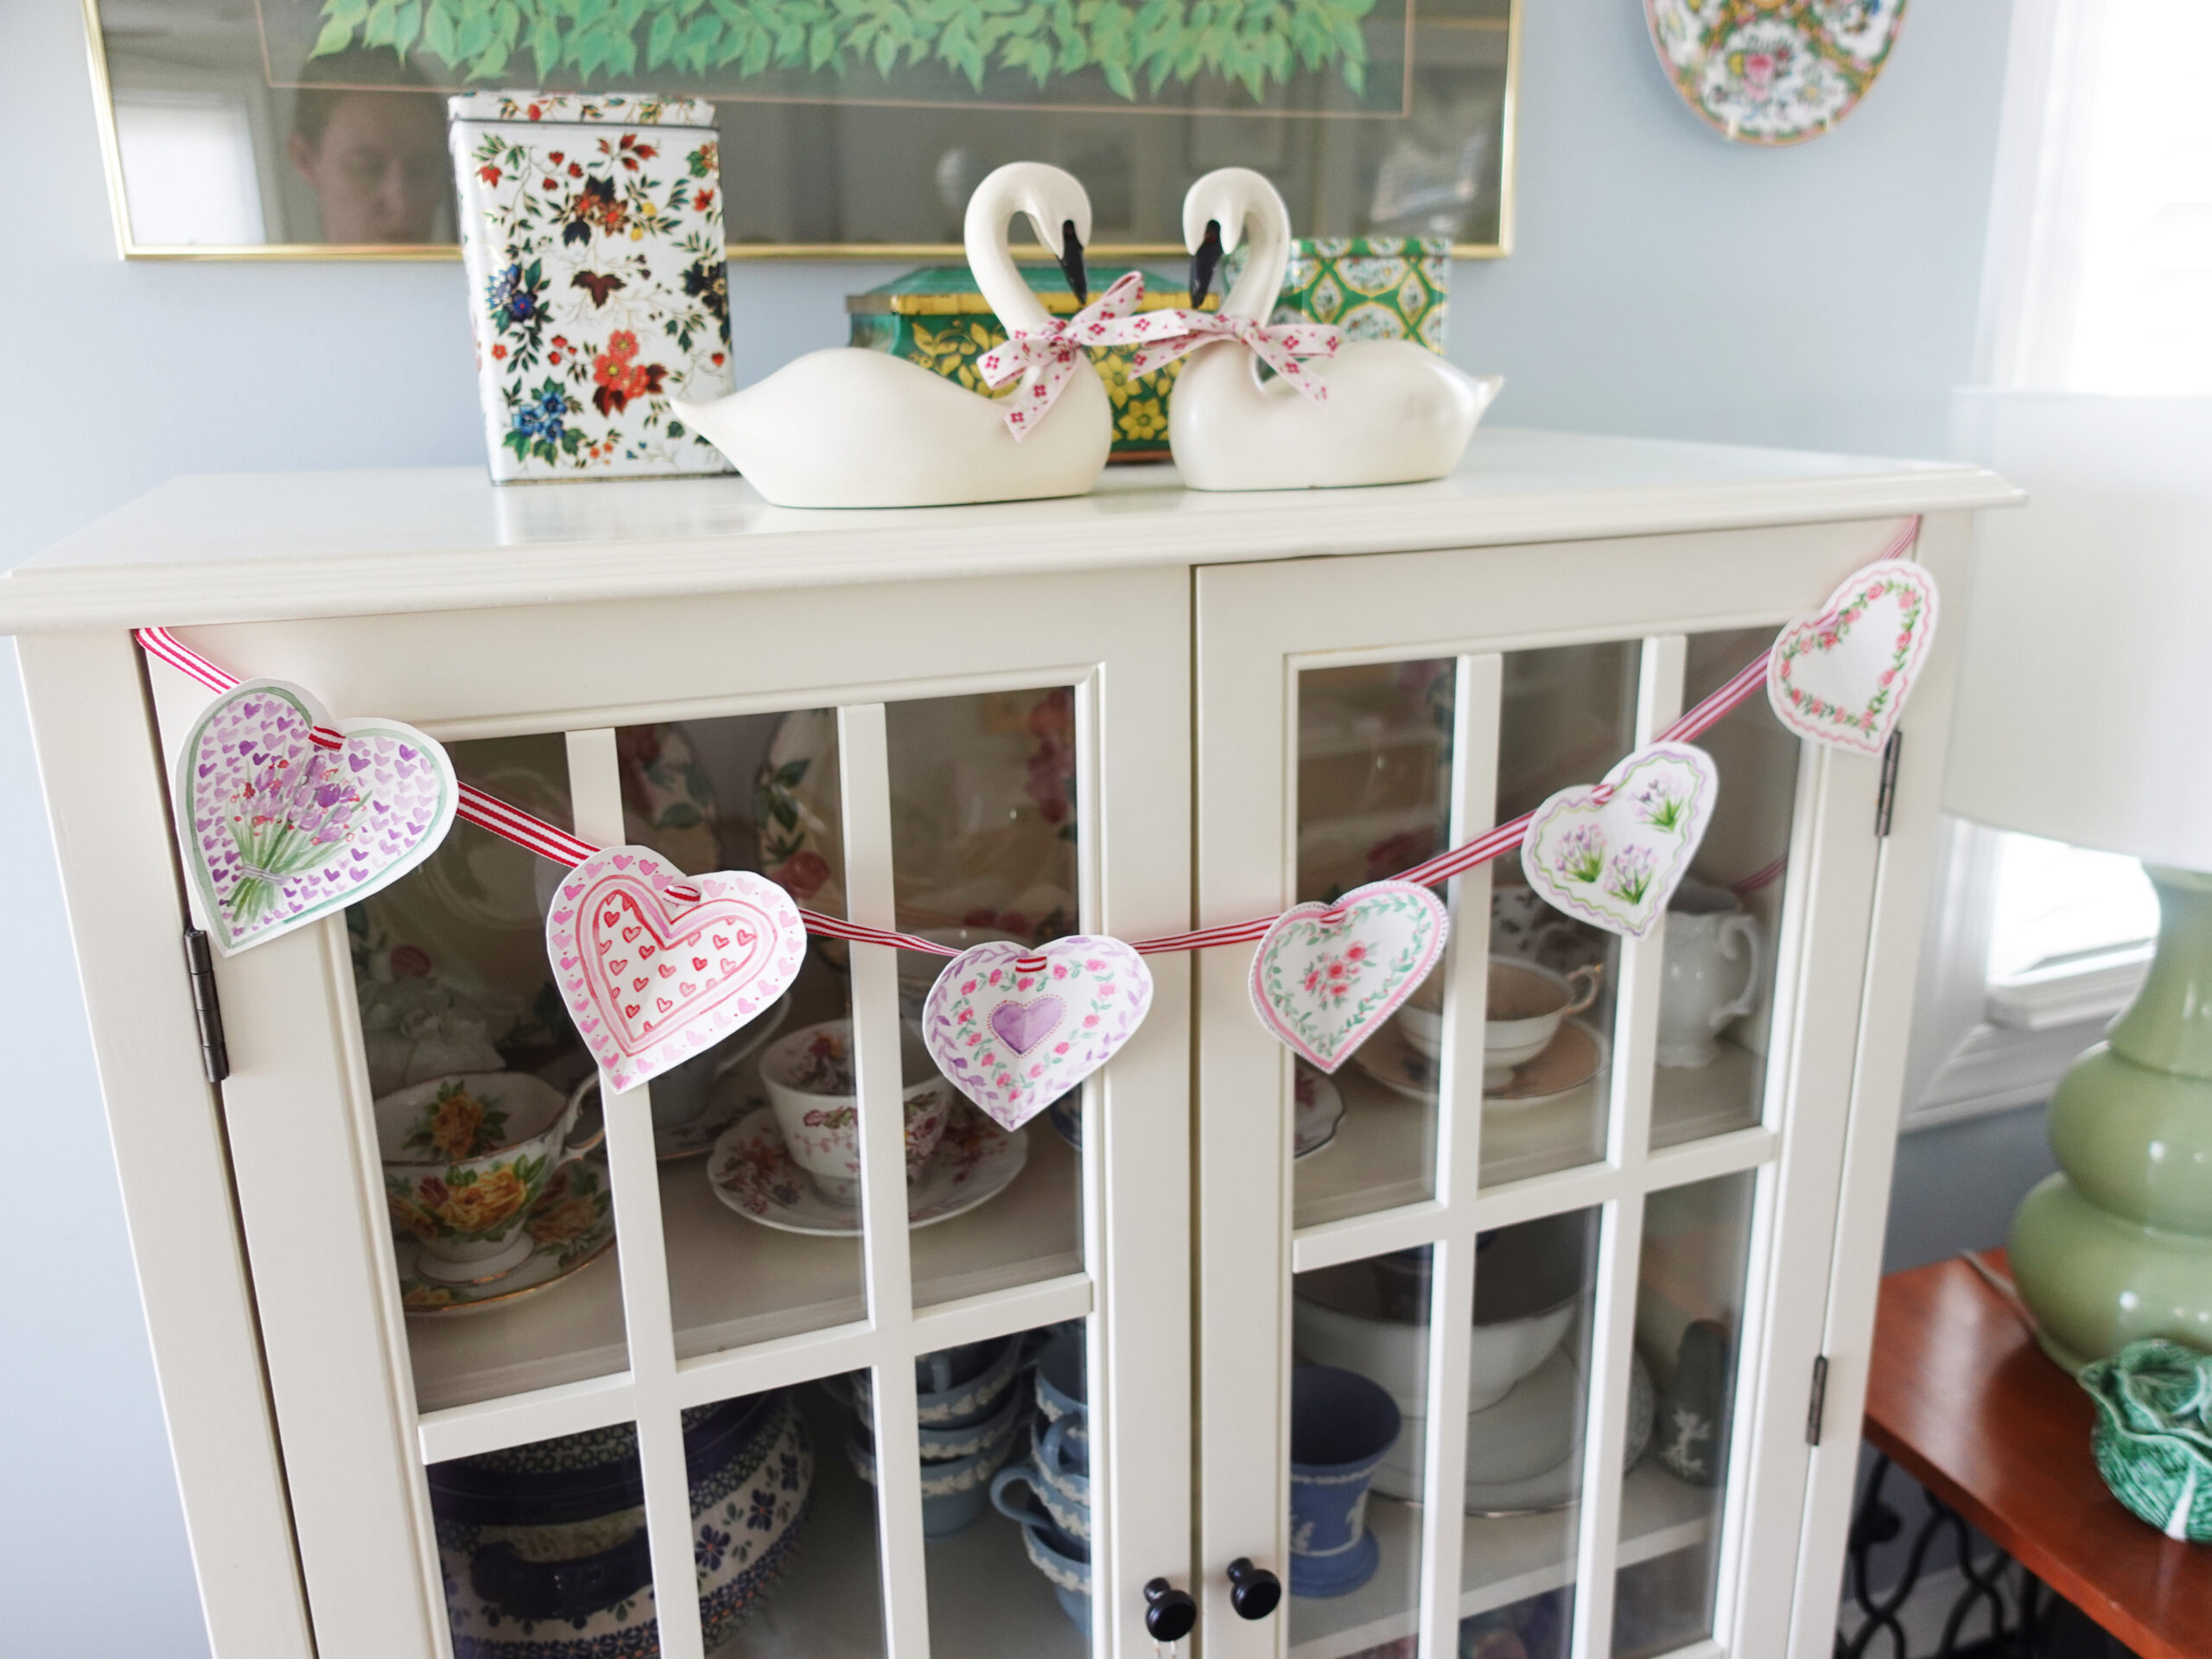
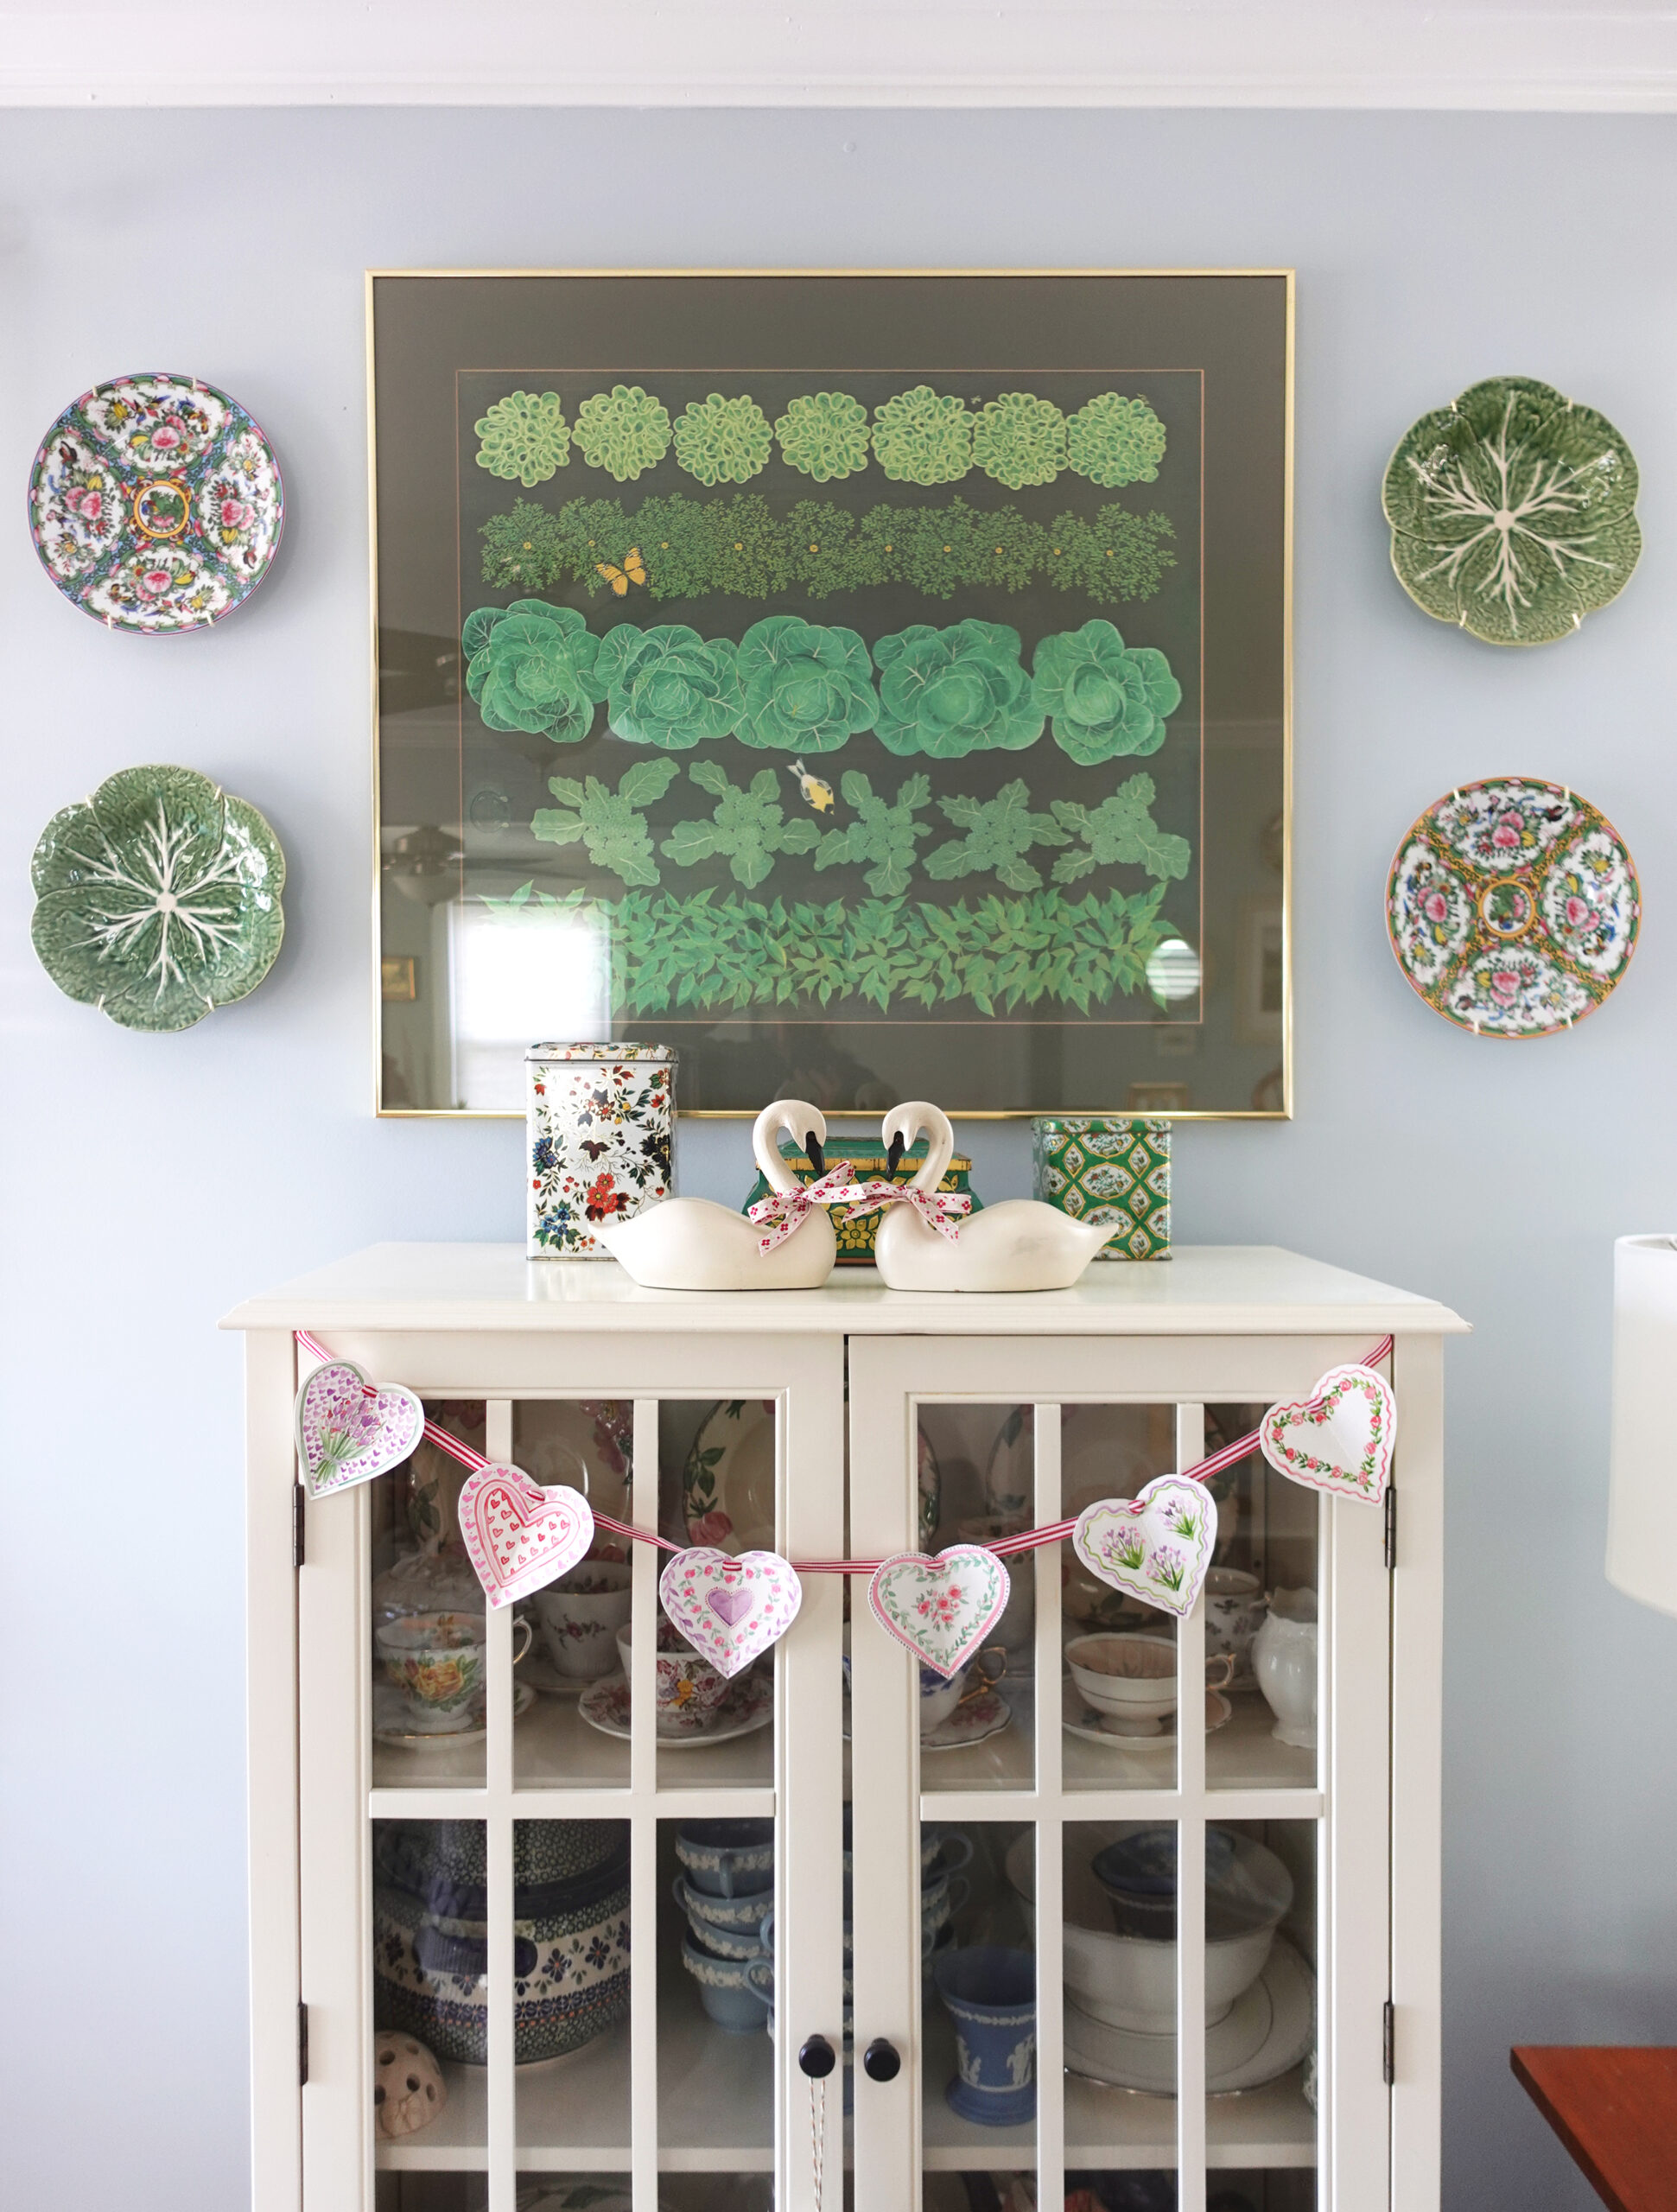
Yay! Now the house feels a bit more festive for Valentine’s Day and we have some pretty floral hearts to look at every time we walk through our living room. I’m hoping to make these creative projects a bit more regularly throughout the year so I’ll be sure to share them as I go. I’d love to see your painted paper heart garland if you decide to make your own. Happy creating!
xoxo,